Riding the Wave of Beach-Inspired Nail Trends
Beach nails have become the hottest trend in nail art, capturing the essence of sun-soaked days and salty breezes. This style brings the carefree spirit of coastal living right to your fingertips. With a wide array of designs inspired by ocean waves, sandy shores, and tropical scenery, beach nails offer endless possibilities for creativity. From subtle shimmer to bold patterns, these manicures cater to every taste and style preference. Nail enthusiasts and casual beachgoers alike have embraced this trend, making it a year-round favorite that evokes memories of seaside vacations.
The versatility of beach nails allows for both simple, everyday looks and elaborate designs perfect for special occasions. As this trend continues to grow, new techniques and color combinations emerge, keeping the style fresh and exciting. Whether you’re planning a beach getaway or simply dreaming of one, beach nails provide the perfect way to carry a piece of paradise with you wherever you go. In the following sections, we’ll dive into the various aspects of beach nails, from color palettes to application techniques, ensuring you have all the information needed to create your own stunning seaside-inspired manicure.

Color Palettes: Capturing the Essence of Coastal Beauty
The right color palette serves as the foundation for any beach-inspired nail design. Ocean blues reign supreme in this category, ranging from deep navy to light turquoise. These shades perfectly capture the varying hues of sea water under different lighting conditions. Sandy neutrals, including beige, tan, and soft gold, complement the blue tones and represent the shoreline. For a tropical twist, incorporate vibrant corals, sunny yellows, and lush greens reminiscent of exotic flowers and palm trees. Shimmery whites and silvers can be used to mimic the sparkle of sunlight on water or the iridescence of seashells.
Don’t shy away from incorporating metallic accents, particularly gold, which can add a touch of luxury reminiscent of sunsets reflecting on the ocean. Pastel variations of these colors work well for a softer, more subdued beach look. When selecting your palette, consider the overall effect you want to achieve. A monochromatic blue scheme can create a serene, ocean-inspired look, while a combination of bright colors can evoke the energy of a lively beach party. Remember, the key to a successful beach nail color palette lies in balancing these hues to create a cohesive and visually appealing design.
Textures and Finishes: Adding Dimension to Your Beach Nails
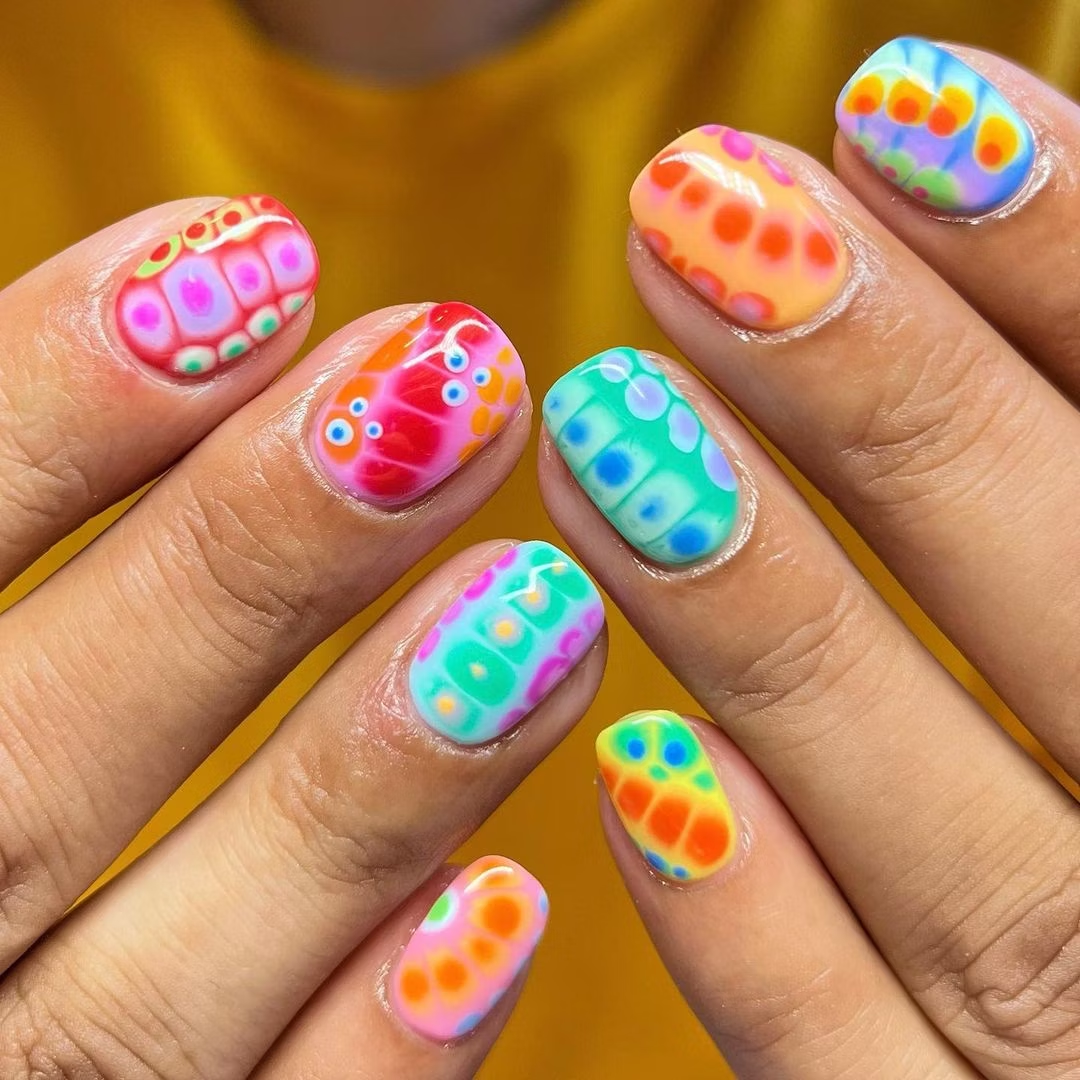
Textures and finishes play a crucial role in bringing beach nail designs to life. Glitter polishes in various sizes and colors can mimic the sparkle of sand or the shimmer of water under sunlight. Holographic finishes create a mesmerizing effect that resembles the iridescence of fish scales or the inside of seashells. Matte top coats can be used to create a weathered, sandblasted look or to contrast with glossy elements in the design. For a more tactile experience, consider using textured polishes that dry with a slightly rough feel, similar to sand.
Metallic finishes in gold, silver, or rose gold add a touch of glamour and can represent various beach elements like sunlight or seashells. Jelly polishes, with their translucent quality, are perfect for creating a water-like effect or for layering to achieve depth in your design. Chrome powders can be applied for a mirror-like finish that reflects light beautifully, much like calm water on a sunny day. Don’t forget about magnetic polishes, which can create patterns resembling waves or ripples in the water. By combining different textures and finishes, you can create a multi-dimensional beach nail design that captures the varied surfaces found in coastal environments.
Essential Techniques for Beach Nail Art
Mastering a few key techniques will elevate your beach nail art to the next level. The gradient or ombré technique proves invaluable for recreating the gradual color changes seen in ocean water or sunsets. Achieve this effect by sponging on layers of polish, blending colors seamlessly. Water marbling creates swirling patterns that resemble ocean waves or the mixing of sand and water at the shore. This technique involves dropping polish onto water and creating designs before dipping the nail. For detailed elements like seashells or starfish, fine-tipped nail art brushes or dotting tools become essential.
These allow for precise line work and intricate patterns. Stamping offers a quick and easy way to add complex beach-themed designs to your nails, with plates featuring waves, palm trees, and other coastal motifs. The dry brush technique, where a nearly dry brush is used to create textured strokes, works well for mimicking the appearance of weathered driftwood or palm fronds. Foils and transfer papers can add interesting textures and metallic accents to your beach nails. Lastly, don’t underestimate the power of negative space in your designs. Leaving parts of the nail bare can create striking contrasts and represent elements like beach umbrellas or sailboats on the horizon.
Popular Beach Nail Designs and Motifs
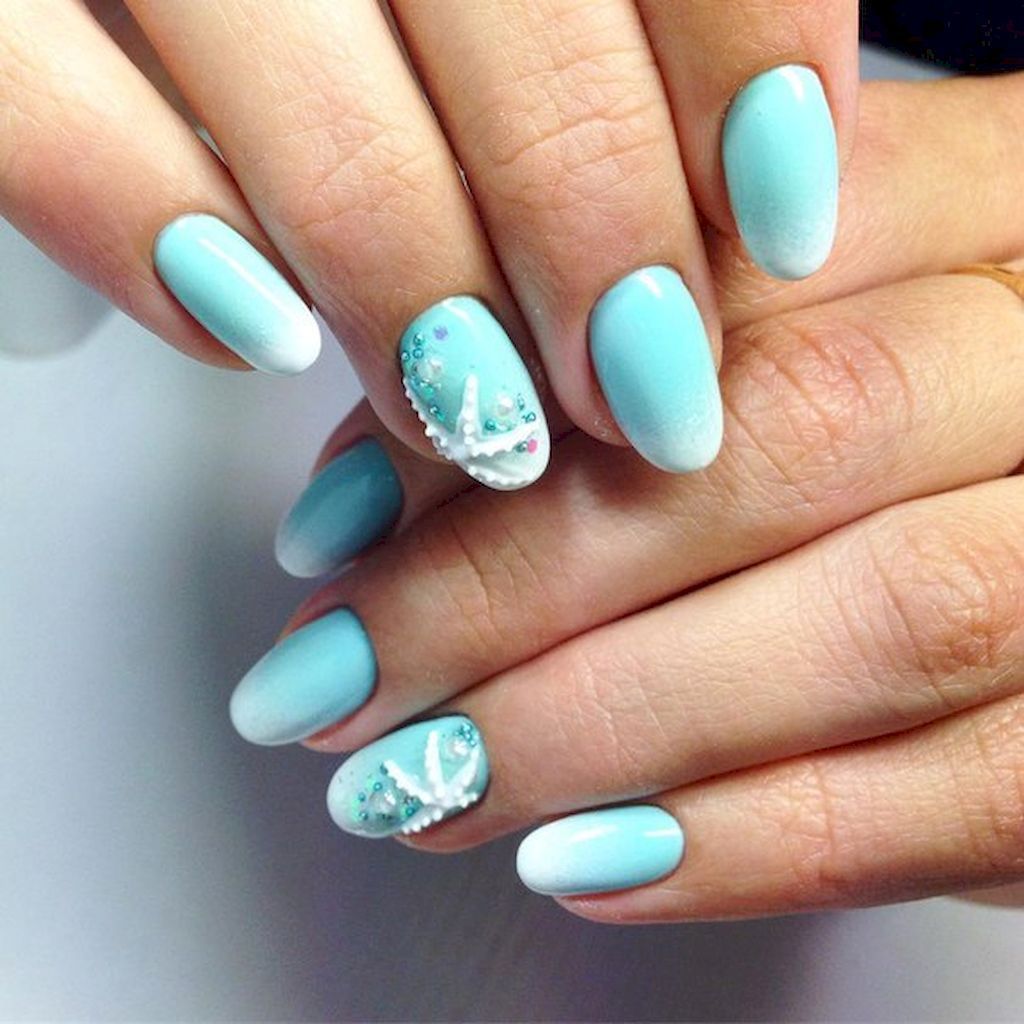
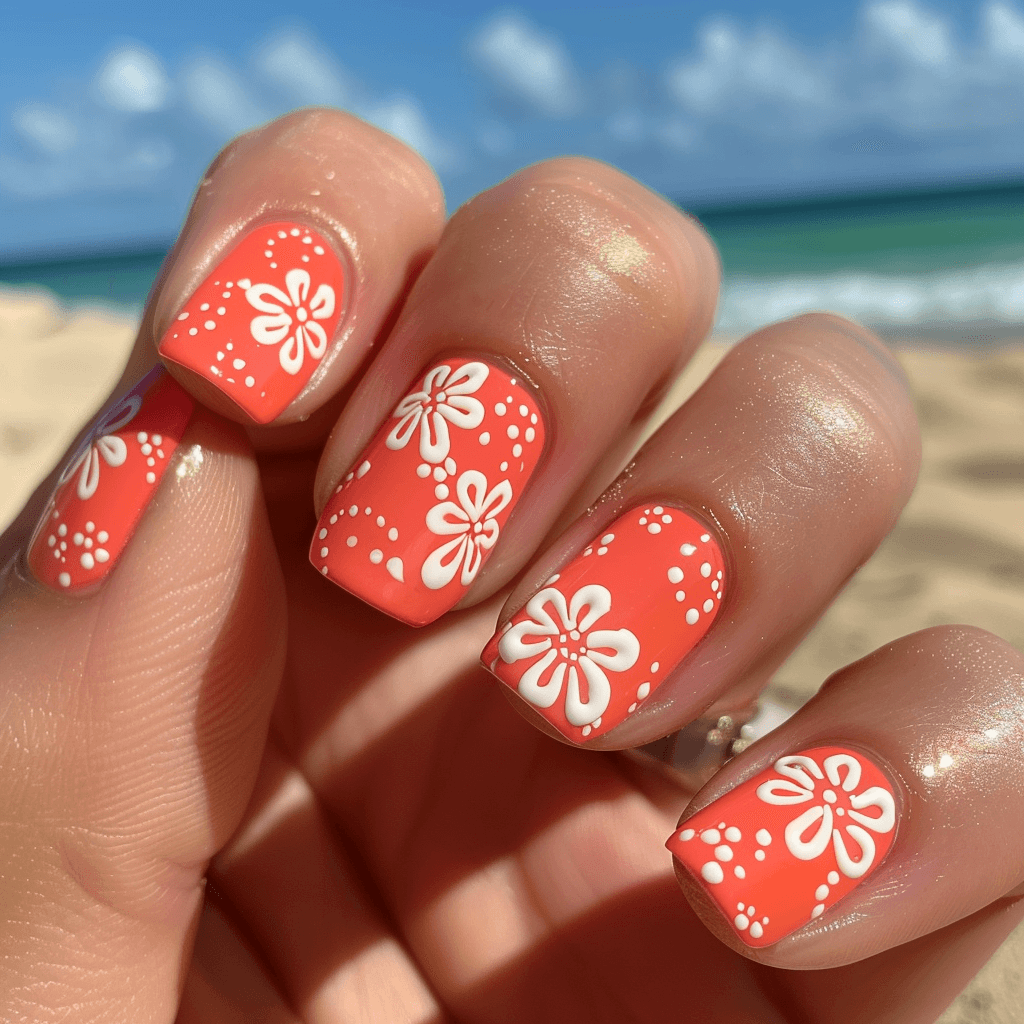
Beach nail art encompasses a wide range of popular designs and motifs that capture the essence of coastal living. Wave patterns rank among the most sought-after designs, with variations ranging from simple curved lines to more complex, photorealistic depictions of crashing waves. Palm tree silhouettes, often created using black polish against a sunset gradient background, evoke tropical vibes. Seashell designs, including scallop shapes and spiral patterns, add a delicate touch to any beach-inspired manicure. For a whimsical approach, consider incorporating cute sea creatures like starfish, seahorses, or cartoon-style fish.
Anchor motifs and nautical stripes bring a classic maritime feel to beach nails. Surfboard designs or tiny beach umbrella accents can add a fun, sporty element to your manicure. Sand dollar patterns, easily created with dotting tools, offer a subtle nod to beachcombing adventures. For those who prefer abstract designs, try creating a mosaic-like pattern using small geometric shapes in beach-inspired colors. Sunset-inspired gradients, complete with silhouetted landscapes, make for stunning statement nails. Remember, these motifs can be mixed and matched, allowing for endless creativity in your beach nail designs.
Tools and Products for Achieving Perfect Beach Nails
Creating stunning beach nails requires the right set of tools and products. Start with a good quality base coat to protect your nails and ensure smooth application of color. Invest in a range of polishes in beach-inspired hues, including creams, shimmers, and glitters. A fast-drying top coat is essential for sealing your design and adding shine. For nail art, fine-tipped brushes in various sizes allow for detailed work, while dotting tools help create perfect circles for elements like bubbles or sand dollars. Striping tape proves useful for creating clean lines and geometric patterns.
Nail stamping kits, including plates with beach-themed designs, offer a quick way to add intricate patterns. Sponges are necessary for creating gradient effects, while silicone tools can help with more advanced techniques like reverse stamping. Consider investing in some nail foils or transfer papers for adding metallic accents easily. Rhinestones and studs in shapes like starfish or shells can add a three-dimensional element to your beach nails. Don’t forget practical items like acetone for cleanup, cuticle oil to keep your nails healthy, and a good hand cream to complete your beach-ready look. With these tools and products at your disposal, you’ll be well-equipped to create a wide variety of beach nail designs.
Nail Care Tips for Beach-Ready Hands
Maintaining healthy nails and hands is crucial for showcasing your beautiful beach nail art. Start by keeping your nails trimmed and filed to your desired shape. Square, round, or almond shapes all work well with beach-inspired designs. Regularly push back and care for your cuticles to create a clean canvas for your nail art. Moisturize your hands and nails daily, paying extra attention to the cuticles. This helps prevent dryness and cracking, especially important if you spend time in salt water or sun. Consider applying a strengthening treatment or oil to your nails a few times a week to keep them flexible and prevent breakage.
Protect your hands and nails from sun damage by applying sunscreen, including over your nail polish. If you’re heading to an actual beach, wear gloves while swimming to prevent chip and protect your manicure from sand and salt water. Stay hydrated and maintain a balanced diet rich in biotin, vitamin E, and omega-3 fatty acids to promote nail health from the inside out. Avoid using your nails as tools to prevent breakage and chipping of your design. When removing your beach nail art, use a gentle, acetone-free remover to minimize damage to your nails. By following these nail care tips, you’ll ensure that your nails remain the perfect canvas for your beach-inspired creations.
DIY Beach Nails: Tips for At-Home Manicures
Creating beach nails at home can be a fun and rewarding experience. Start with clean, dry nails and apply a base coat to protect your natural nails and help the polish adhere better. When working with multiple colors, always allow each layer to dry completely before adding the next. This prevents smudging and ensures crisp, clean designs. For gradient effects, use a makeup sponge to dab on colors, blending them where they meet. Create texture by dabbing a barely-there layer of a contrasting color over your base using a fan brush or old toothbrush.
Experiment with household items for unique effects – plastic wrap pressed onto wet polish can create a water-like texture, while a drinking straw can blow polish into branch-like patterns for coral designs. Use tape to create clean lines for color blocking or geometric patterns. Toothpicks or bobby pins can substitute for dotting tools in a pinch. Practice patience when creating intricate designs, and keep cotton swabs and nail polish remover handy for quick clean-ups. Don’t forget to seal your creation with a top coat for longevity and shine. Remember, perfection comes with practice, so don’t be discouraged if your first attempts aren’t salon-quality. The joy of DIY beach nails lies in the creative process and the unique, personalized results.
Seasonal Adaptations: Beach Nails Year-Round
While beach nails might seem like a summer-only trend, clever adaptations can make this style appropriate for any season. In spring, incorporate soft pastels and floral elements alongside traditional beach motifs for a fresh take on the trend. Light blue and green gradients can represent the awakening of nature, while small flower accents can symbolize blooming seaside plants. Summer allows for the boldest and brightest beach nail designs, with vivid colors and playful patterns taking center stage. This is the perfect time for full-on tropical designs, complete with palm trees, exotic flowers, and sea creatures.
As autumn arrives, shift to warmer tones like deep teals, burnt oranges, and rich golds. These colors can still evoke a coastal feel while acknowledging the changing seasons. Consider designs that incorporate autumn leaves floating on water or seashells nestled in fall-colored sand. Winter beach nails can focus on the serene aspects of coastal landscapes. Icy blues, silver accents, and white details can create stunning winter beach scenes. Designs might include snowflakes falling over ocean waves or glittery polish representing frosty sand. By adapting color palettes and incorporating seasonal elements, beach nails can remain a beautiful and relevant choice throughout the year.
Professional vs. DIY: Choosing the Right Approach for You
Deciding between professional and DIY beach nails depends on various factors, including skill level, time, and budget. Professional nail technicians bring expertise and access to high-quality products, often resulting in more intricate and longer-lasting designs. They can execute complex techniques like 3D art or perfect gradients with ease. Professional applications also tend to last longer, making them ideal for special occasions or vacations. However, salon visits can be costly and time-consuming. DIY beach nails, on the other hand, offer unlimited opportunities for creativity and experimentation at a fraction of the cost.
Creating your own designs allows for complete customization and the satisfaction of wearing your own art. It’s also more convenient, as you can touch up or change your design whenever you like. The downside is that DIY attempts may not look as polished as professional work, especially for beginners. They may also not last as long without the right techniques and products. For those new to nail art, a middle ground might involve getting a professional base manicure and adding simple beach-inspired elements at home. Ultimately, the choice between professional and DIY depends on your personal preferences, skill level, and the specific design you want to achieve. Whichever route you choose, beach nails offer a fun and expressive way to showcase your style and love for coastal beauty