Introduction to DIY Facial Cleansers
The trend for wholesome, natural beauty routines is on the rise. And it’s easy to see why. Creating your own DIY facial cleanser gives you control over what touches your skin. It can be a fun and rewarding experience. You pick the ingredients based on what works best for your skin’s unique needs. With a few basic supplies, you can whip up a cleanser that’s as effective as high-end brands. This guide will walk you through the basics of homemade facial cleansers. We’ll cover why they can be better than store-bought options. We will help you understand how to blend ingredients that both cleanse and nurture your skin.
In this introduction, we’ll explore what makes DIY facial cleansers a great choice. This includes their affordability, customizability, and the sheer joy of creating something by hand. Plus, we’ll touch on the importance of knowing what goes into your skincare. By making your own products, you avoid hard-to-pronounce chemicals found in many commercial cleansers. Ready to dive in? Let’s discover the wonders of crafting your personalized skin care with diy facial cleanser recipes.

Benefits of Homemade Facial Cleansers
Making homemade facial cleansers has many advantages. Here are the key benefits:
- Cost-Effective: Store-bought facial cleansers can be pricey. Creating your own diy facial cleanser can save you money. You can use simple, affordable ingredients without compromising quality.
- Customization: With DIY options, you get to choose what goes into your product. You can tailor your facial cleanser to perfectly match your skin type and preferences. This means better results and happier skin.
- No Harsh Chemicals: Many commercial cleansers contain chemicals that can be harsh on the skin. By making your own, you avoid these substances. Instead, you can use gentle, natural ingredients.
- Freshness: Homemade cleansers can be made in small batches. This ensures they are always fresh. You benefit from the full potency of the ingredients each time you cleanse.
- Eco-Friendly: DIY facial cleansers generally mean less packaging waste. You can reuse containers and reduce your environmental impact.
- Transparency: You know exactly what’s in your facial cleanser. There are no hidden ingredients. This gives you peace of mind about what you’re applying to your skin.
- Therapeutic Activity: The process of making your own skin care products can be soothing. It’s a creative way to de-stress and create something beneficial for your well-being.
These benefits highlight why more people are choosing to make their own facial cleansers at home.
Understanding Skin Types and Ingredients
To craft an effective diy facial cleanser, understand your skin type. Skin types include oily, dry, combination, sensitive, and normal. Each type has unique needs. Knowing yours guides your choice of ingredients. Oily skin types may need ingredients that regulate oil production. Dry skin calls for hydrating and moisturizing elements. Combination skin requires a balance of both. Sensitive skin benefits from gentle, non-irritating ingredients. Normal skin has the most flexibility.
Ingredients play a critical role in the success of your facial cleanser. Common ingredients include honey, oils like coconut or jojoba, and natural astringents like witch hazel. Items from your kitchen, such as yogurt or oatmeal, can also be used. Consider their properties and how they interact with your skin. Honey is moisturizing and has antibacterial properties. Oils often provide deep nourishment. Witch hazel can help tighten pores. Always choose high-quality, pure ingredients for the best results.
To summarize, understanding your skin type and the properties of various ingredients is essential. It ensures you make the right diy facial cleanser that promotes radiant skin.

Simple Recipes for Every Skin Type
Crafting the perfect DIY facial cleanser recipe for your skin is key to achieving radiant skin. Here are straightforward recipes suited for various skin types, so you can find your perfect match.
Oily Skin Cleanser Recipe
For oily skin, a cleanser that helps control oil without over-drying is essential. Try this mixture:
- 1 tablespoon of natural witch hazel
- 2 teaspoons of fresh lemon juice
- 1/4 cup of distilled water
Blend these together and apply with a cotton pad. The lemon helps balance oil, while witch hazel tones.
Dry Skin Cleanser Recipe
Dry skin craves moisture. Here’s a gentle, hydrating recipe:
- 1/4 cup of organic coconut oil
- 1 teaspoon of honey
- A few drops of lavender oil
Warm coconut oil and mix well with honey and lavender. This cleanser is both nourishing and soothing.
Combination Skin Cleanser Recipe
Finding equilibrium for combination skin is possible with this cleanser:
- 2 tablespoons of organic yogurt
- 1 tablespoon of ground oatmeal
- Few drops of jojoba oil
Combine these for a cleanser that balances and moisturizes the skin’s different areas.
Sensitive Skin Cleanser Recipe
Sensitive skin needs a gentle touch. Try this mix:
- 1/2 cup of cucumber water (blend cucumber and strain the juice)
- 1 tablespoon of aloe vera gel
- 1 teaspoon of sweet almond oil
This cleanser will calm and soothe your sensitive skin without causing irritation.
Normal Skin Cleanser Recipe
Normal skin has the most flexibility, so you can enjoy this simple recipe:
- 1 tablespoon of honey
- 1 tablespoon of whole milk
- A sprinkle of ground almonds
This mixture cleanses while providing gentle exfoliation for bright, fresh skin.
All these diy facial cleanser recipes can be easily made at home. They offer natural care tailored to your skin’s needs. These homemade solutions are a healthy choice for a stunning complexion.
Specialized Cleansers for Targeted Concerns
Crafting a DIY facial cleanser that targets specific skin concerns is an advanced step. Once you have a handle on the basics, you can create cleansers for issues like acne, blackheads, or early signs of aging. Let’s look at how to enhance recipes to focus on these concerns.
Acne-Prone Skin Cleanser Recipe
If you have acne-prone skin, you need a recipe that fights bacteria and controls oil. Combine the following:
- 1 tablespoon of green tea (cool and brewed)
- 1 tablespoon of honey
- A few drops of tea tree oil
Green tea and tea tree oil have antibacterial properties, while honey soothes the skin.
Blackhead Removal Cleanser Recipe
To target blackheads, a cleanser needs to unclog pores. Try this mix:
- 1 tablespoon of bentonite clay
- 1 teaspoon of apple cider vinegar
- Enough water to form a paste
Apply to your face and rinse after it dries. The clay draws out impurities, and apple cider vinegar helps exfoliate.
Anti-Aging Cleanser Recipe
For early signs of aging, ingredients with antioxidants are key. Use:
- 2 tablespoons of mashed avocado
- 1 teaspoon of cocoa powder
- A few drops of vitamin E oil
Avocado and cocoa powder are full of antioxidants, and vitamin E supports skin health.
These specialized diy facial cleanser recipes address specific skin issues. They show how homemade cleansers can be as effective as commercial ones in treating skin concerns.
Natural Ingredients and Their Benefits for Skin
When making a DIY facial cleanser, choosing the right natural ingredients is vital. These elements bring a range of benefits to nurture and heal your skin. Below are some popular natural ingredients and the wonders they work on the skin:
- Honey: Honey is a natural humectant. It draws moisture into the skin, making it perfect for hydration. Its antibacterial qualities also help to fight acne.
- Coconut Oil: Rich in fatty acids, coconut oil is ideal for its deep moisturizing capabilities. It can also help to remove makeup gently.
- Witch Hazel: Known for its astringent properties, witch hazel can reduce inflammation and tighten pores.
- Jojoba Oil: Jojoba oil closely mimics the skin’s natural oils. It can help to balance oil production, making it suitable for both oily and dry skin types.
- Tea Tree Oil: With its powerful antibacterial properties, tea tree oil is excellent for treating acne-prone skin.
- Aloe Vera: Aloe vera is soothing and anti-inflammatory. It is beneficial for healing and calming sensitive or irritated skin.
- Oatmeal: Oatmeal is not just a breakfast staple; it’s a gentle exfoliant and is known for its soothing properties on the skin.
- Avocado: Avocado is packed with vitamins and antioxidants. It is great for nourishing the skin and combating signs of aging.
- Cucumber: The high water content in cucumber makes it a refreshing and hydrating ingredient for skin care.
- Green Tea: Green tea is full of antioxidants. It protects the skin against environmental damage and reduces redness.
Making your DIY facial cleanser with these ingredients can lead to a healthier, more radiant complexion. They allow you to address various skin issues while treating your skin to the nourishment it needs. Now that you’re familiar with the benefits of natural ingredients, let’s move on to crafting your homemade facial cleanser with maximal effectiveness.

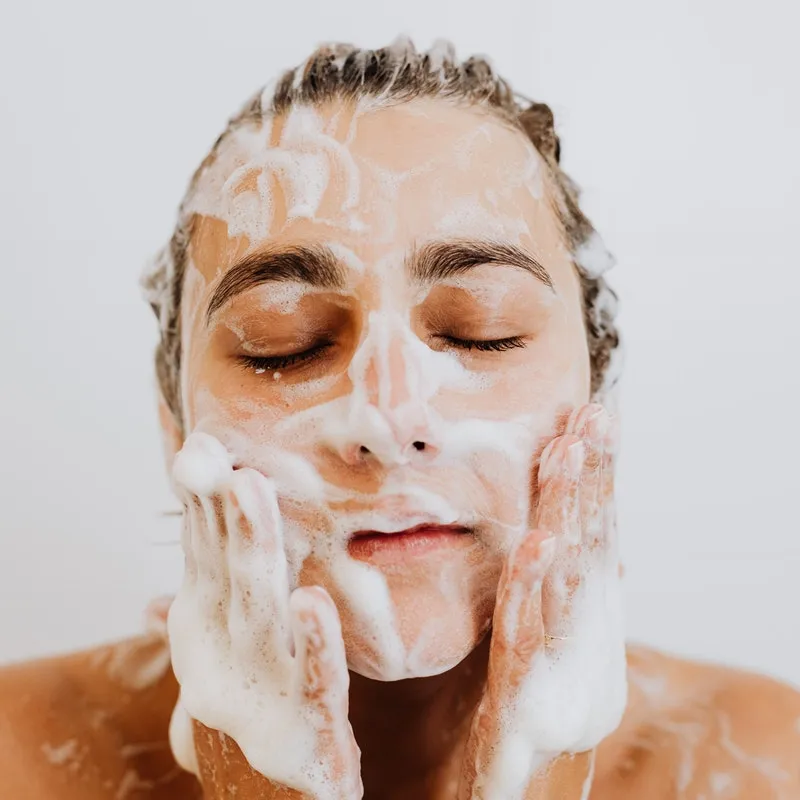
Tips for Making and Applying DIY Facial Cleansers
When diving into the world of DIY facial cleansers, it’s important to not only focus on the ingredients and recipes but also on the methods of making and applying them to get the most out of your homemade skincare. Here are some tips that can make a significant difference in your DIY skincare routine.
Choosing the Right Containers
Always use clean, sterilized containers for storing your cleansers. This prevents bacteria growth and ensures the longevity of your product. Glass jars are a great choice as they don’t react with ingredients and are easy to sterilize.
Mixing Techniques
Be gentle when mixing ingredients, especially those that are delicate like vitamin E oil or essential oils. Over-mixing can break down the properties of these sensitive components. A simple stir is usually enough.
Patch Testing
Before using any new skincare product, even if it’s homemade, do a patch test. Apply a small amount on your inner arm and wait 24 hours for any adverse reactions. This step is crucial, especially for sensitive skin types.
Application Method
Apply your DIY cleanser with clean hands or a soft cloth. Massage it into your skin in a circular motion. This enhances blood flow and helps the ingredients penetrate more effectively.
Rinsing Thoroughly
Make sure to rinse your face thoroughly with lukewarm water after using your DIY cleanser. Residual cleanser can attract dirt and may lead to irritation or breakouts.
Frequency of Use
Start by using your new cleanser once a day to see how your skin reacts. If your skin responds well, you can increase it to twice a day, in the morning and evening.
Pay Attention to Shelf-life
Natural ingredients have a shorter shelf life than commercial products. Make small batches of your cleanser so it stays fresh and effective. Note the date of creation and keep track of any changes in smell or texture.
By following these tips, you can ensure that your skin receives the full benefits of your diy facial cleanser without any unnecessary complications. Happy crafting!

Preserving Your Homemade Facial Cleansers
Creating your own skincare means considering how to make it last. This is vital for diy facial cleanser recipes. These tips will help extend the shelf life of your homemade facial cleansers.
Choose the Right Preservatives
Natural preservatives can help your cleanser stay fresh longer. Examples are vitamin E oil, rosemary extract, and grapefruit seed extract. Use them in small amounts according to the recipe.
Refrigeration
Keeping your cleanser in the fridge can slow down the growth of bacteria and mold. It also keeps ingredients like cucumber or aloe vera at peak freshness.
Airtight Containers
Store your cleansers in airtight containers to prevent contaminants. Glass or BPA-free plastic jars with tight lids work well.
Keep it Dry
If your cleanser is powder-based, like one with ground oatmeal, keep it dry until use. Moisture invites bacteria, so only mix with water when you’re ready to wash your face.
Small Batches
Make small batches of your diy facial cleanser. This means you’ll use them up while they are still potent and less likely to spoil.
Use Clean Utensils
When mixing or applying your cleanser, use clean spoons or spatulas. This prevents adding germs into your mixture. Wash your hands before applying your cleanser.
Pay Attention to Smell and Color
Watch for changes in smell, color, or texture. These can signal that your cleanser is past its best. When in doubt, make a fresh batch.
By following these preservation tips, you can enjoy your homemade facial cleansers longer. This ensures that every application is as beneficial as the first. Remember, fresh is best when it comes to diy skin care.