Introduction to Vertical Labret Piercings
A vertical labret piercing is a distinctive type of body art. It punctures the lower lip vertically. Unlike horizontal labrets, this style enters just below the lip’s edge and exits at the lip’s top surface. It is important to know the anatomy for vertical labret piercings. This knowledge helps avoid nerve damage and ensures proper placement. The jewelry sits on the lip, making it visible both on top and underneath. This piercing offers a bold look and several jewelry options. Choosing this piercing needs careful consideration due to its location and healing process.
Having a clear understanding of the anatomy for vertical labret is crucial. It determines the success of the piercing. It also minimizes risks associated with lip piercings. A professional with understanding of facial anatomy should perform the piercing. They can ensure aesthetics and safety. In the upcoming sections, we will delve into the anatomical details crucial for this piercing. We will discuss pre-piercing considerations and step-by-step piercing process. Moreover, we address aftercare and potential complications to look out for. Let’s embark on this journey to understand vertical labret piercings fully.
Anatomy of the Lip: Understanding Vertical Labret Placement
For effective vertical labret placement, knowing the lip’s anatomy is critical. The lip consists of skin, muscle fibers, connective tissue, and mucous membrane. These layers cover the orbicularis oris muscle. This muscle controls lip movement. Safe placement of a vertical labret piercing respects these structures. A piercer aims to avoid large blood vessels and nerves. When placed correctly, the jewelry will pass through the lip’s soft tissue. It should not disrupt muscle function.
Key points inform the piercer’s technique. First, they pinpoint the labret’s entry and exit points. This ensures the piercing is vertical and symmetrical. The piercer also checks for nerve locations to prevent numbness or pain. They must avoid the wet/dry line of the mucous membrane. Piercings too close to this line can stimulate excess saliva or cause discomfort.
Overall, the correct anatomy for vertical labret placement is vital for a stunning outcome. It safeguards against complications and contributes to a smooth healing process. A skilled professional will employ this anatomical knowledge for best results.

How Vertical Labret Piercing Differs From Traditional Labret
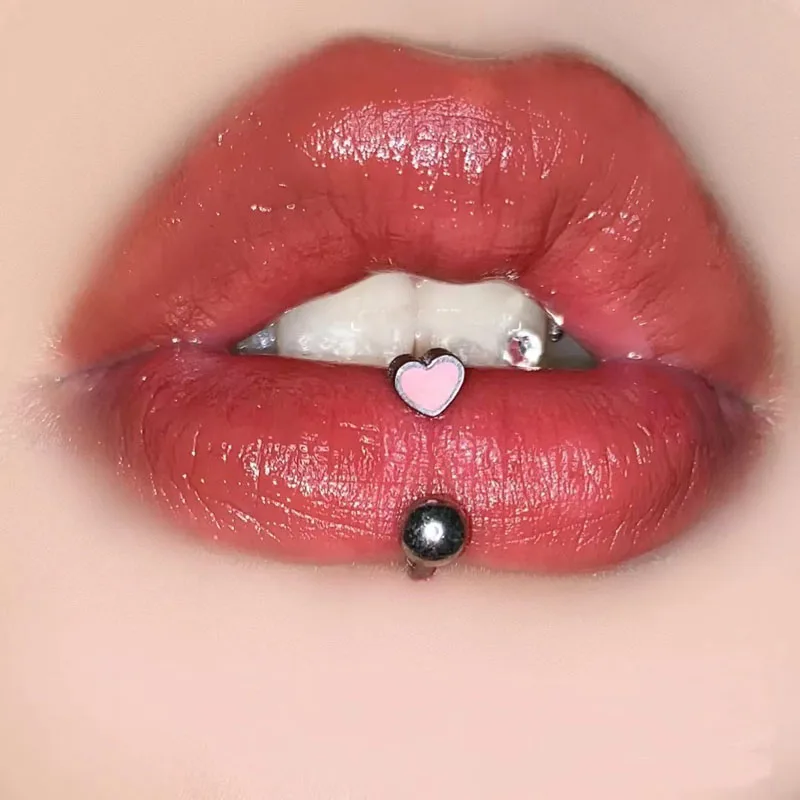
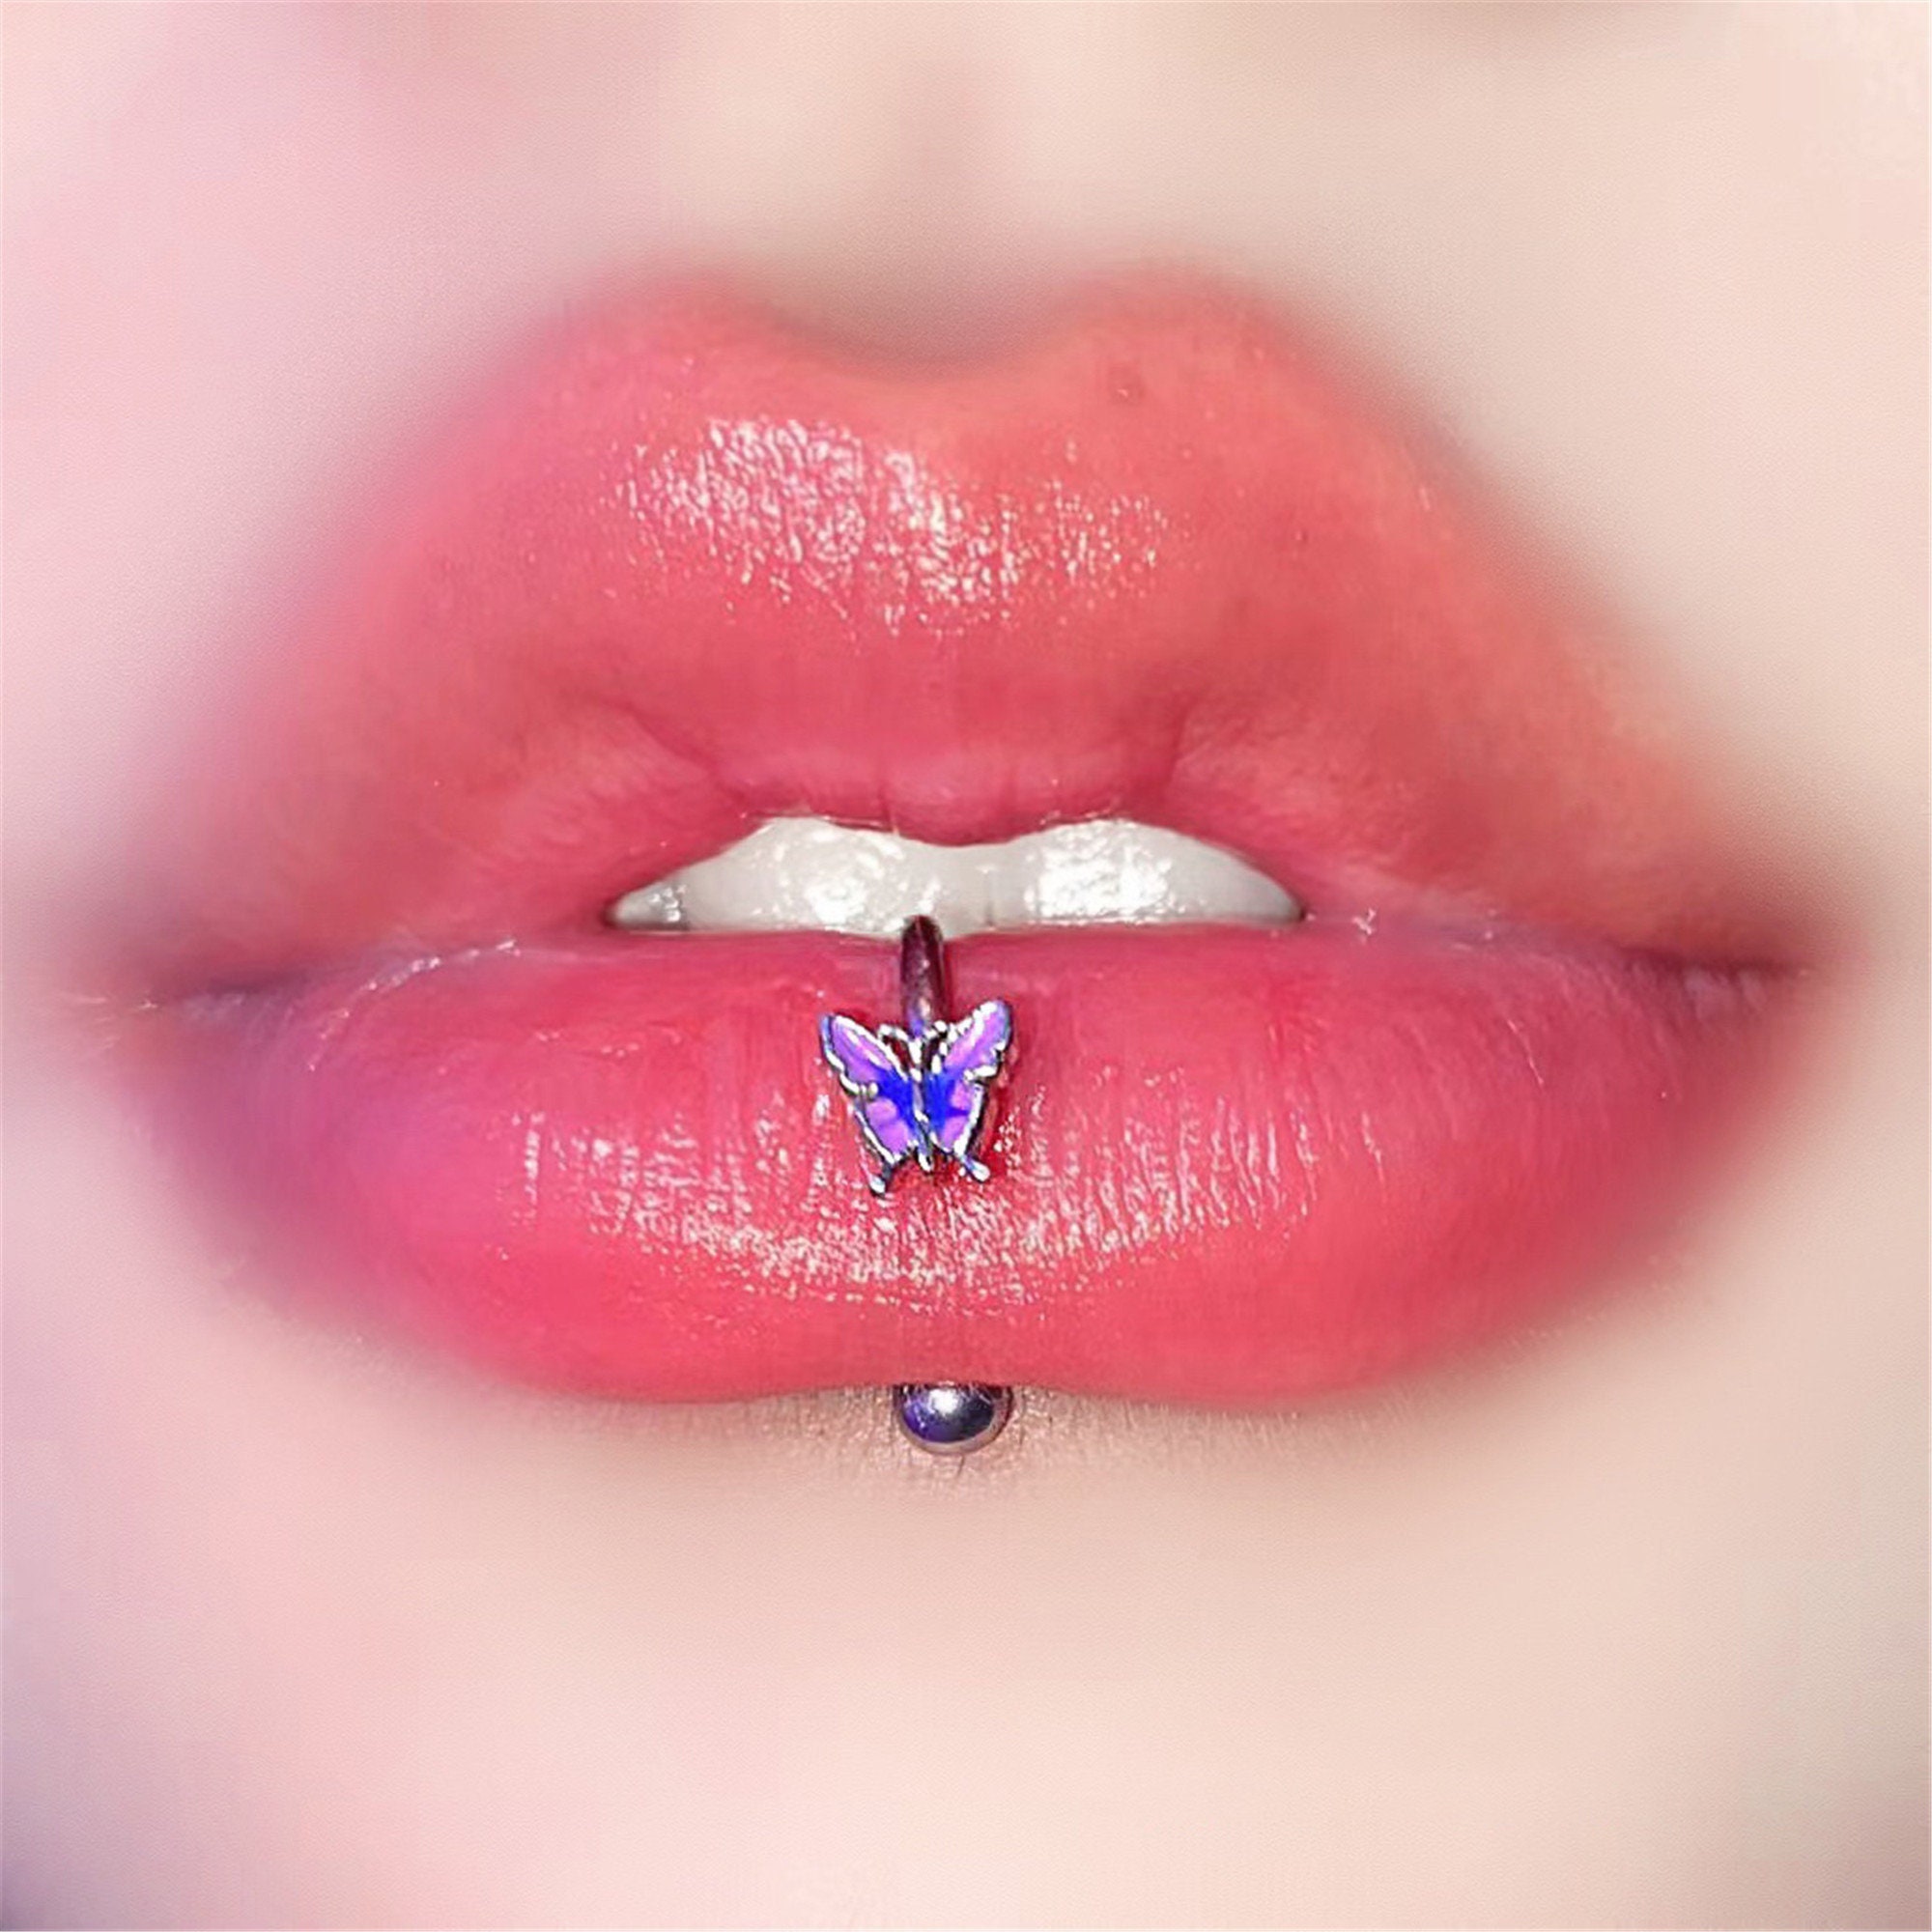
Vertical labret piercings vary from traditional labret piercings in key ways. Traditional labret piercings, also known as ‘standard labrets’, enter the skin just below the lip and exit inside the mouth. In contrast, vertical labret piercings go through the top and bottom of the lip, but do not touch the inside of the mouth at all. This means with a vertical labret, you see both ends of the piercing, showcasing the jewelry prominently.
Here are some differences to consider:
- Piercing Location: Traditional labrets pierce under the lip, against the gum. Vertical labrets penetrate the lip vertically and avoid contact with the gums and teeth.
- Jewelry Visibility: Vertical labrets allow full visibility of the jewelry outside the mouth. Traditional labrets show only the bottom bead or gem outside, with the rest inside the mouth.
- Oral Health Impact: Traditional labrets can affect oral health over time, potentially damaging gums and teeth due to the jewelry’s contact. Vertical labret piercings eliminate these risks because the jewelry does not touch the inside mouth area.
- Healing Process: Healing might differ, as saliva and oral bacteria do not come in contact with a vertical labret piercing, possibly reducing healing time and risk of infection.
- Jewelry Choices: Vertical labrets may offer more diverse options for visible jewelry styles, while traditional labrets are limited by comfort and safety inside the mouth.
Choosing between a vertical and traditional labret largely depends on personal style preferences and concerns about oral health. Each piercing type has its own aesthetic and practical considerations. Consulting with a professional piercer who understand the anatomy for vertical labret can help you make a well-informed decision.
Pre-Piercing Considerations for Vertical Labret
Before deciding on a vertical labret piercing, there are several factors to consider. These considerations help ensure the process goes smoothly and reduces the risk of complications. When it comes to the anatomy for vertical labret piercings, one must be well-informed before taking the plunge. Here’s what potential piercees should think about beforehand:
- Find a Reputable Piercer: Look for a professional with knowledge of the anatomy for vertical labret. They should have a good track record and reviews.
- Assess Your Lip Shape: Everyone’s lips are different. Confirm your lip shape suits a vertical labret piercing with your piercer.
- Consider Your Lifestyle: Active lifestyles or certain jobs might not be compatible with the healing process. Discuss this with your piercer.
- Contemplate Healing Time: Be ready to commit to the healing period. This ensures proper recovery without complications.
- Think About Jewelry: Decide on the style of jewelry beforehand. Remember, it will be a visible part of your appearance.
- Review Medical History: Inform your piercer about any conditions that might affect healing, like diabetes or anemia.
By considering these pre-piercing factors, you’ll be better prepared for your vertical labret piercing. Choosing a professional who understands the anatomy for vertical labret and following their advice is key to a successful piercing experience.
The Piercing Process: Step-by-Step
Getting a vertical labret piercing involves a precise, step-by-step process. Here’s what to expect during your appointment:
- Consultation: You start with a consultation. The piercer examines your lip and discusses the anatomy for vertical labret, along with your desired outcome.
- Marking the Spots: Next, the piercer marks the entry and exit points on your lip. They ensure accuracy for the piercing’s position.
- Cleaning: They clean the area with an antiseptic solution to minimize infection risk.
- Piercing: Using a sterilized needle, the piercer quickly and carefully pushes it through the lip from bottom to top. This respects your lip’s anatomy for vertical labret.
- Inserting Jewelry: Right after the puncture, the piercer inserts your chosen piece of jewelry.
During each step, the piercer wears gloves for hygiene. They also explain what they are doing. This keeps you informed. You may feel a pinch or pressure when the needle goes through. The careful placement of the piercing honors the anatomy for vertical labret and helps prevent nerve damage. After the piercing, you will receive aftercare instructions. It’s crucial to follow these to ensure a healthy healing process.
Aftercare Tips for Vertical Labret Piercing
Caring for your vertical labret piercing is key to a smooth recovery. Here are essential aftercare tips:
- Keep it clean: Twice a day, clean the piercing with saline solution or mild soap. Avoid strong chemicals.
- Touch it less: Do not touch the piercing unless you’re cleaning it. This reduces the risk of infection.
- Watch what you eat: Eat soft foods at first to minimize lip movement. Avoid spicy or acidic foods that may irritate the piercing.
- Ice can help: Use ice packs to reduce swelling. Make sure they’re clean and do not apply them directly.
- Stay hydrated: Drink plenty of water to keep the area hydrated and support healing.
- Check your jewelry: Ensure that the jewelry is secure but avoid fiddling with it. Tighten it only if necessary.
- Protect it from cosmetics: When applying makeup or creams, keep them away from the piercing.
- Follow your piercer’s advice: Specific care instructions may vary. Always follow the guidance given to you by your piercer.
By sticking to these aftercare practices, you help your piercing heal. You also keep the pain and risks to a minimum. Remember, good aftercare is as crucial as the piercing process itself. The key is to be gentle, keep the area clean, and be patient throughout the healing process. If you notice any signs of infection, seek advice from your piercer or healthcare provider promptly.
Potential Complications and How to Avoid Them
When considering a vertical labret piercing, being aware of potential complications is important. It helps in taking preventive measures. Here are common issues to watch for and tips to avoid them:
- Infection: Always get pierced by someone who knows the anatomy for vertical labret well. They should use sterilized tools. Aftercare is key. Clean the area as advised.
- Swelling: Some swelling is normal. Too much isn’t. Use clean, cold compresses to reduce it. If swelling persists, consult your piercer or doctor.
- Allergic Reaction: Be sure to use hypoallergenic jewelry. This minimizes the risk of an allergic response.
- Nerve Damage: An expert piercer can avoid nerves during piercing. This helps prevent numbness or long-term pain.
- Excessive Bleeding: A piercer who knows the anatomy for vertical labret will avoid large blood vessels. This reduces the chance of heavy bleeding.
- Rejection: The body might reject the jewelry. Pick high-quality materials and follow your piercer’s advice to lessen this risk.
- Scarring: Avoid playing with the jewelry. Don’t change it too soon. This helps lower scarring chances.
Remember, responding quickly to any signs of trouble is crucial. Seek professional help if anything seems off. Proper understanding and attention to the anatomy for vertical labret are your best defenses against these complications.
Healing Time and Aftercare Products Recommendations
Healing from a vertical labret piercing typically takes 6 to 8 weeks. During this period, good aftercare is crucial to prevent complications and ensure a quick recovery. Here’s a breakdown of the healing timeline and product recommendations to make your aftercare routine effective:
- Weeks 1-2: Initial healing happens here. Expect redness and some swelling. Use a saline solution or a non-alcoholic mouthwash for cleaning.
- Weeks 3-4: Swelling should subside. Keep cleaning regularly. Watch for any unusual signs like persistent redness or discharge.
- Weeks 5-8: The piercing settles more. Continue with gentle cleaning. Avoid changing the jewelry during this period.
For aftercare products, consider:
- Saline Solution: A sterile saline solution is gentle and ideal for daily cleaning.
- Mild Soap: Use a mild, fragrance-free soap for the external part of the piercing.
- Non-alcoholic Mouthwash: If the inside of the lip is affected, a non-alcoholic mouthwash can help keep the area clean.
- Ice Packs: To soothe swelling, clean ice packs can be applied externally.
- Emollient Cream: A gentle, water-based cream can keep the skin hydrated.
Using these products according to the recommended timeline will support a smooth and effective healing process. Remember to always follow the specific advice given by your professional piercer about aftercare and product use.