Holographic nail polish has taken the beauty world by storm, offering a mesmerizing blend of colors that shimmer and change with every angle. Whether you’re preparing for a night out or simply want to add some sparkle to your everyday look, holographic nail polish provides a unique and eye-catching finish. In this comprehensive guide, we’ll explore everything you need to know about holographic nail polish, from achieving the perfect application to maintaining its dazzling effect. Discover the secrets behind the most captivating nail looks and elevate your manicure game with our expert tips and tricks.
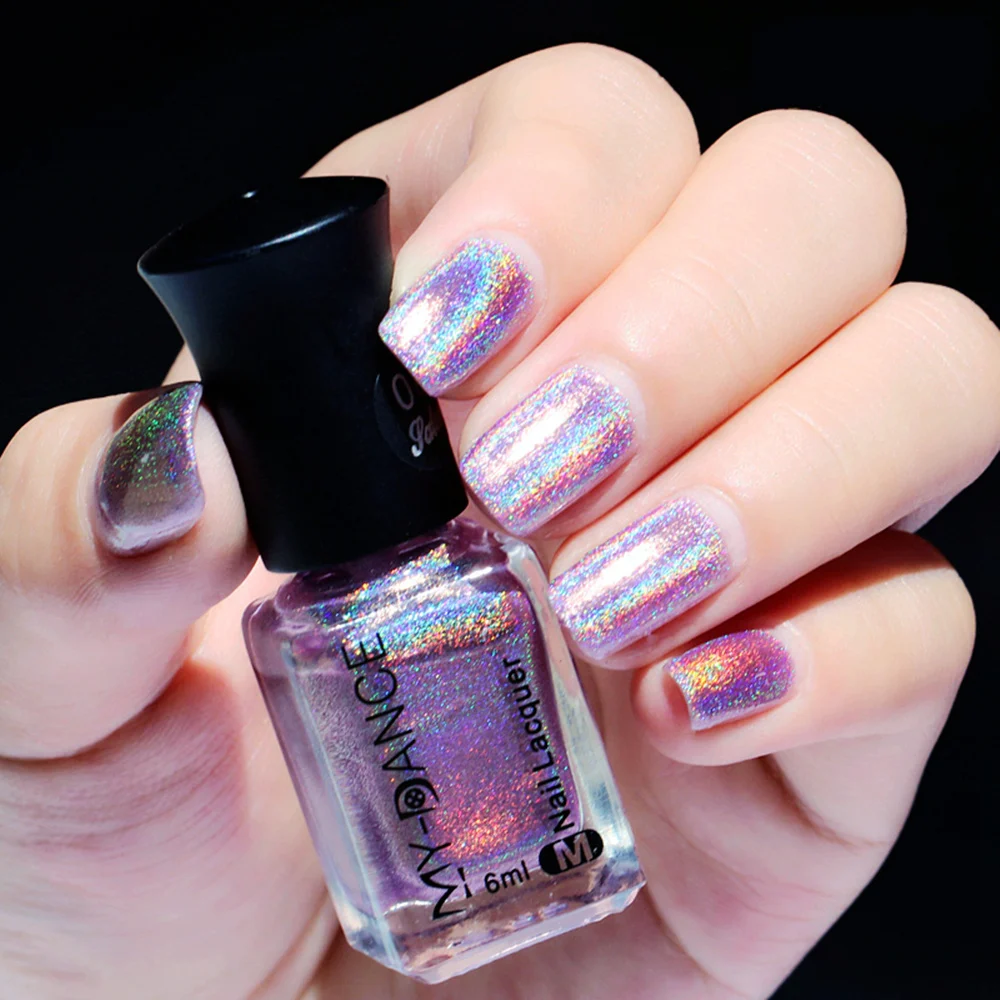
 The Nail Polish That Looks Like a ‘Rainbow Laser Show’ Without Overlapping Colors
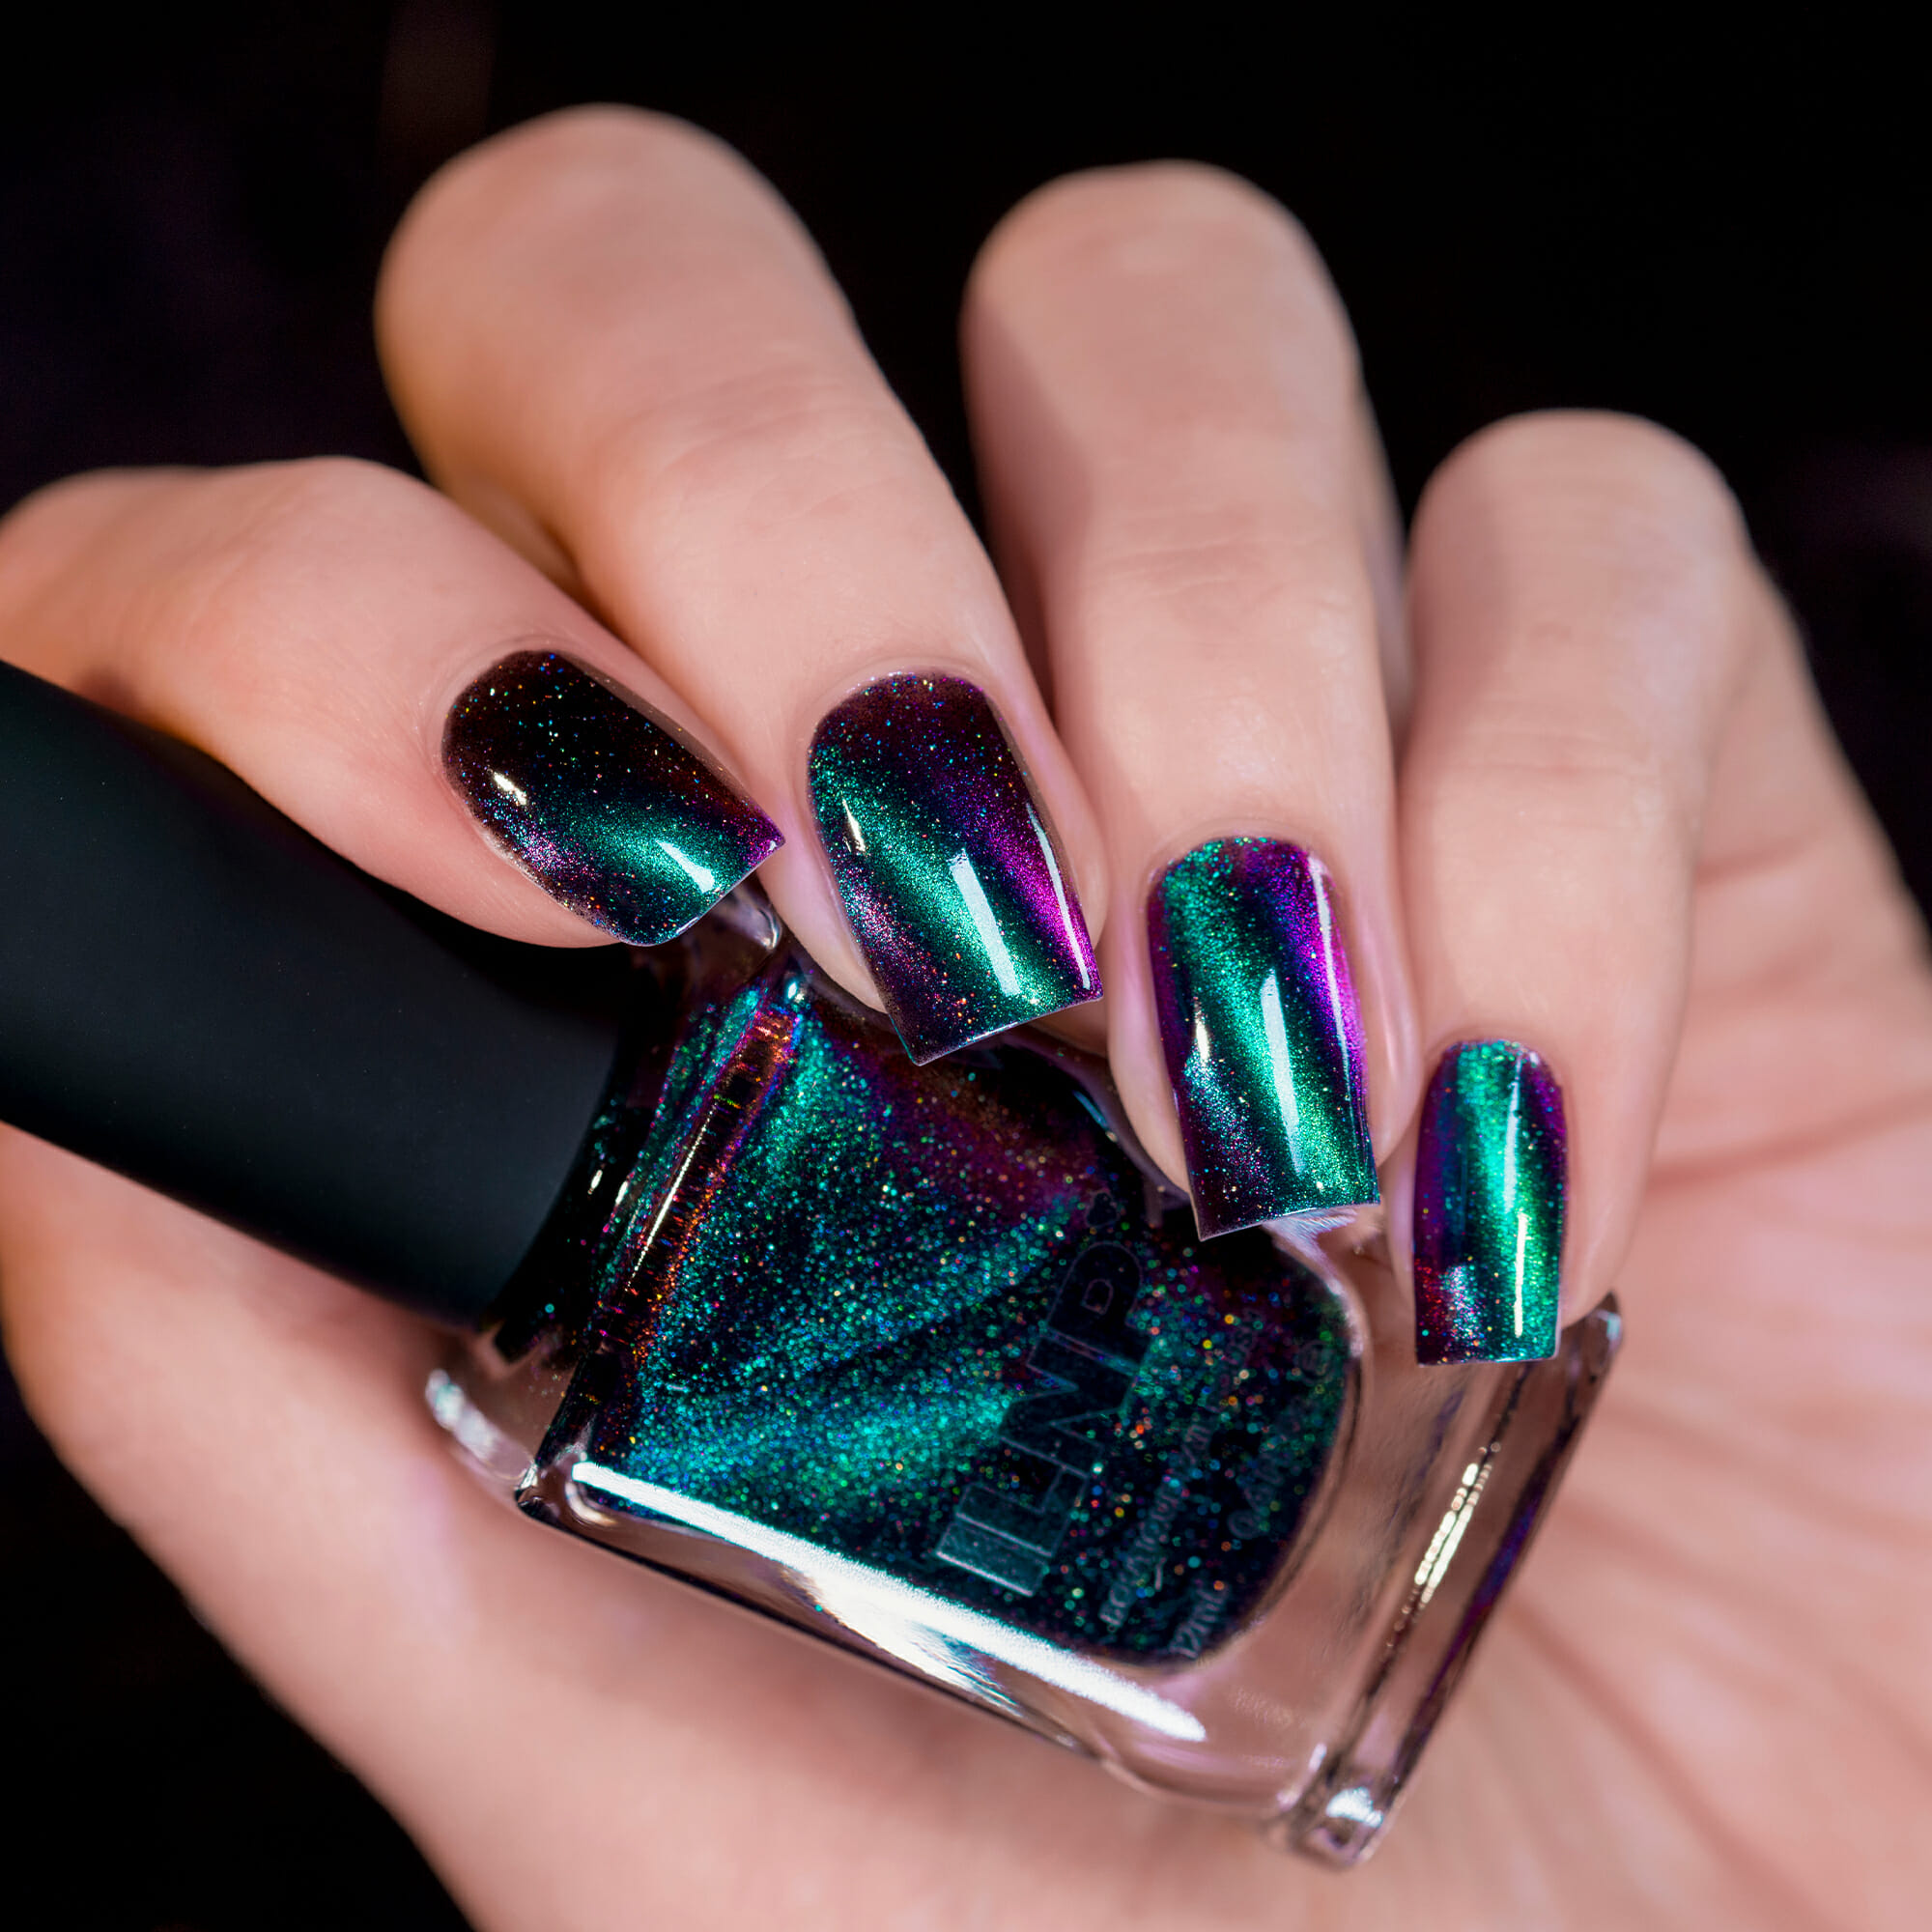
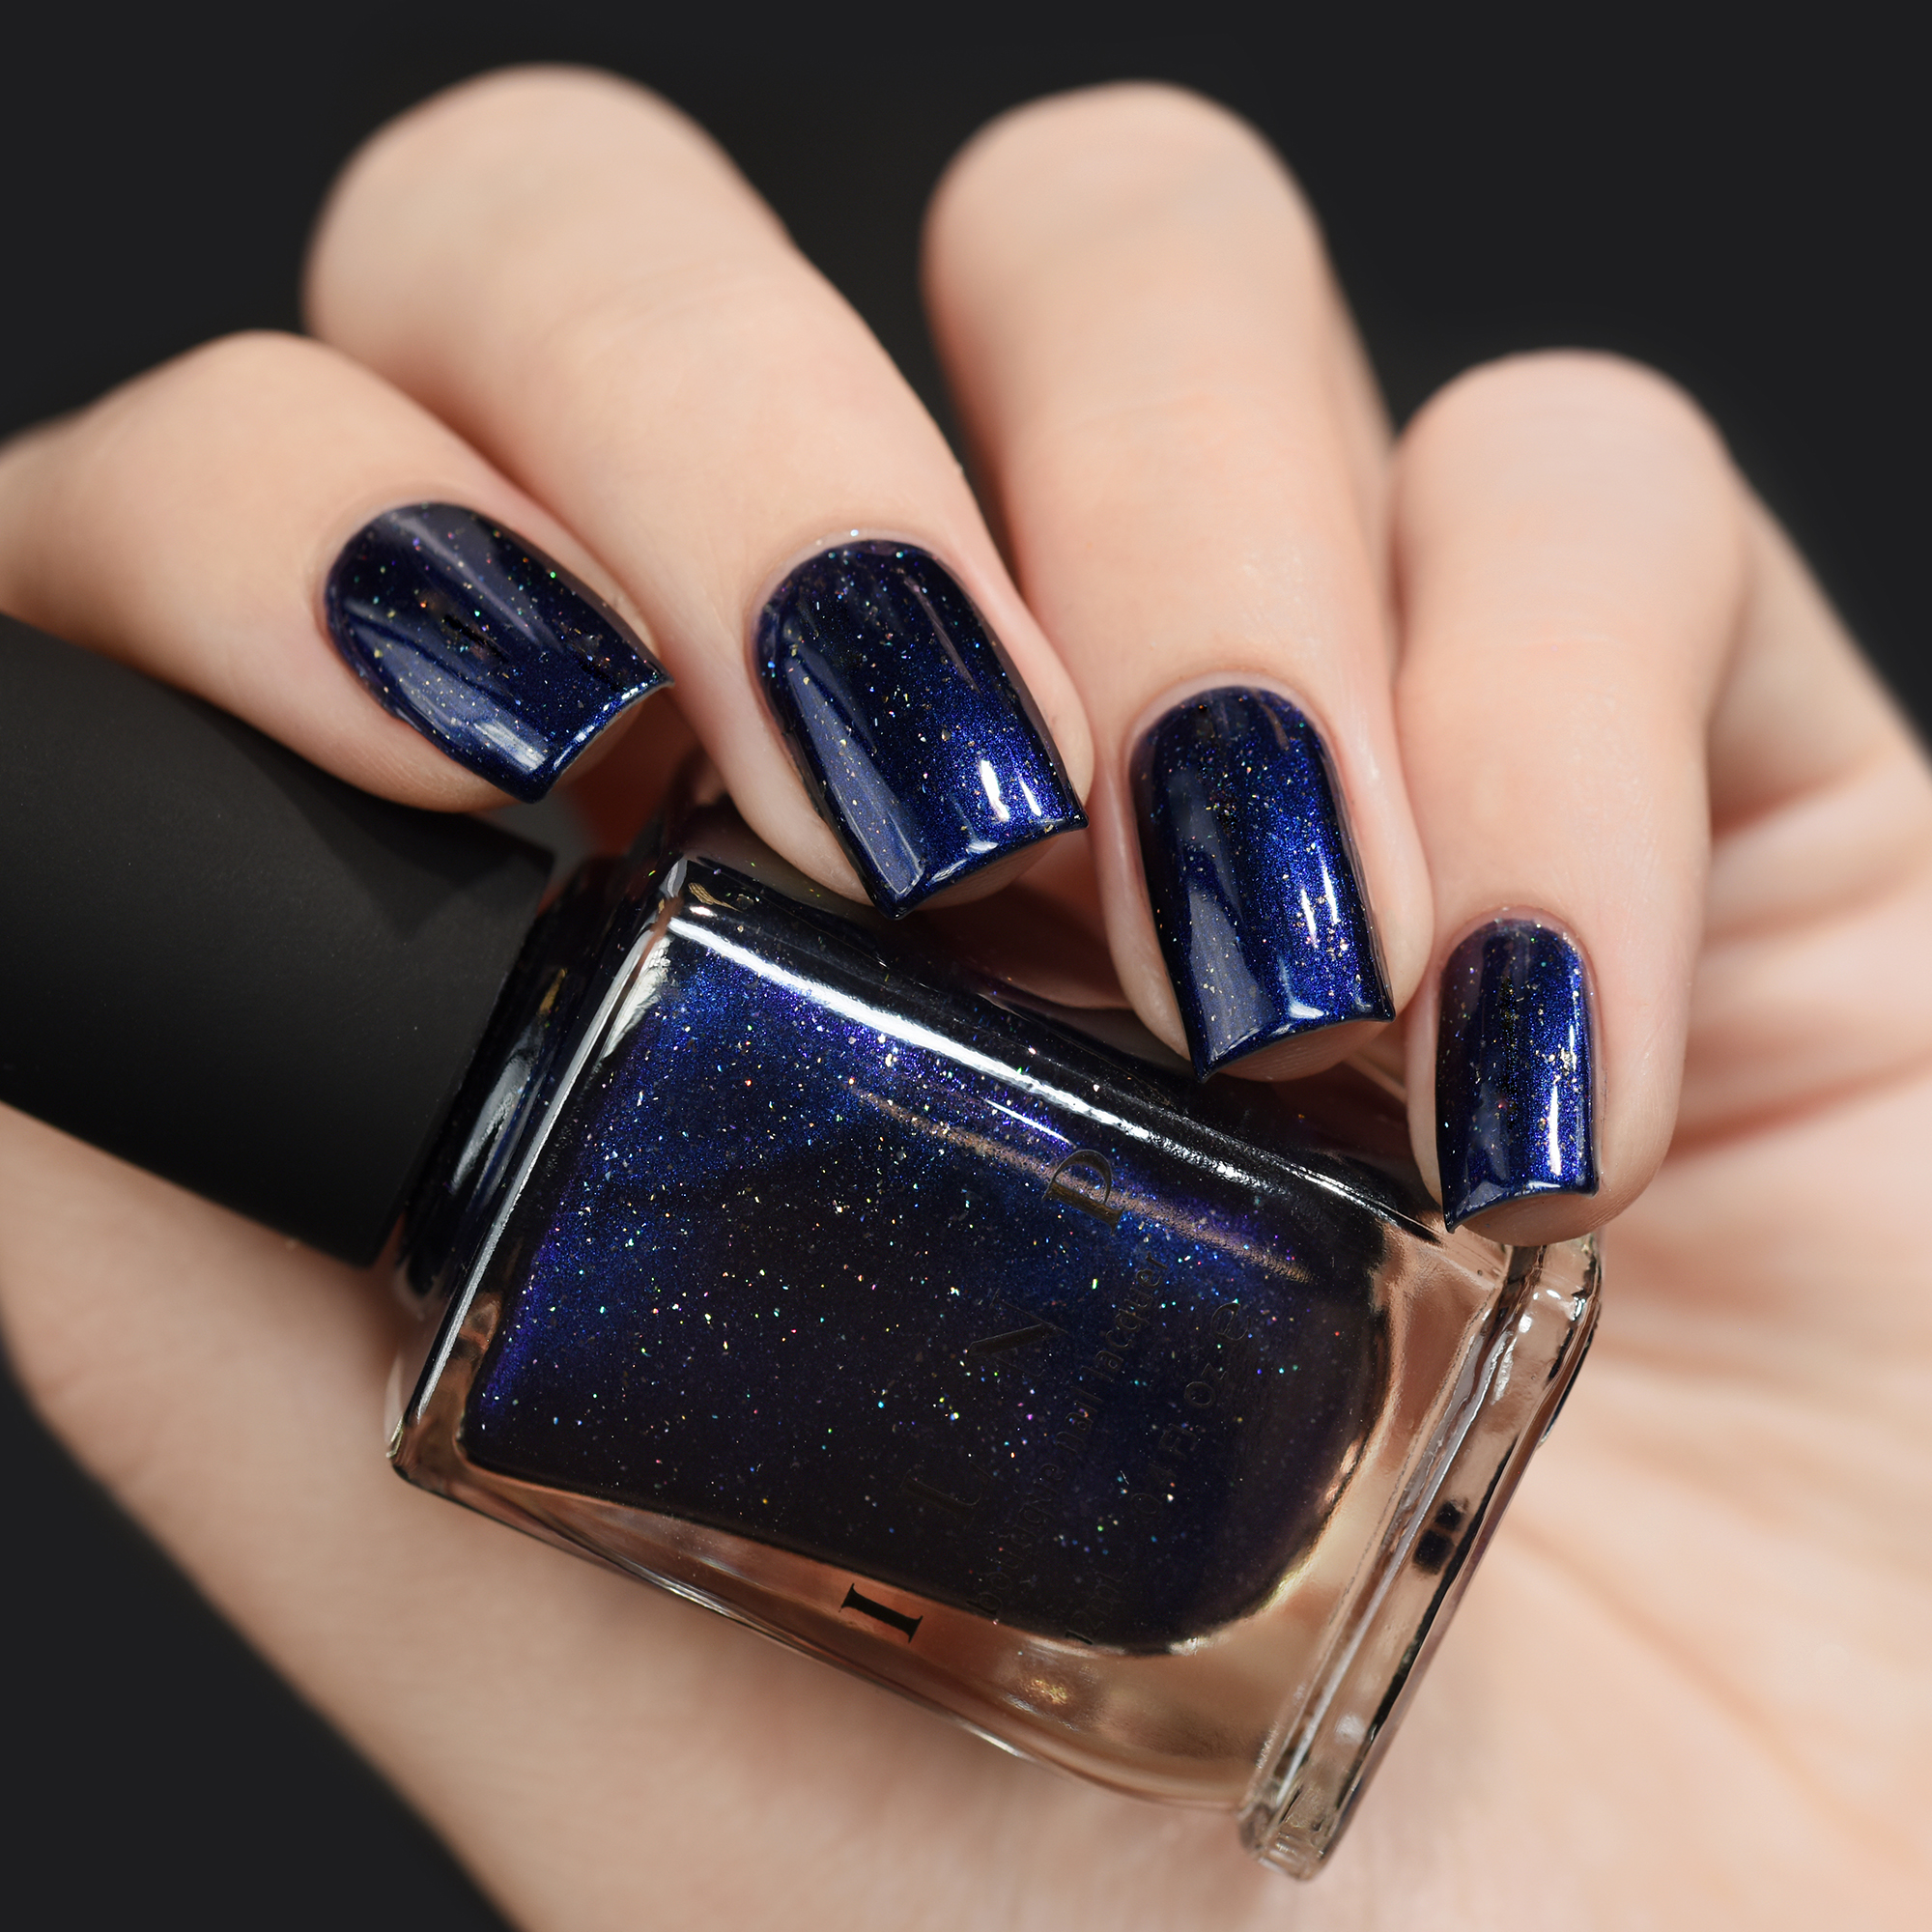
Imagine your nails reflecting a vibrant rainbow laser show without the hassle of layering multiple colors. Holographic nail polish achieves this stunning effect through its special pigments and light-reflecting particles. These polishes contain tiny holographic particles that refract light, creating a dynamic, multi-dimensional appearance. Unlike traditional nail polishes that require several coats to build color intensity, holographic formulas deliver an all-in-one showstopper finish.
Why Holographic Polishes Stand Out
- Unique Light Reflection: The holographic particles bend light in various directions, producing a spectrum of colors that change based on your movement and the light source.
- Effortless Shine: With just one coat, you can achieve a high-shine, reflective surface that mimics the look of a laser show.
- Versatile Applications: Perfect for both everyday wear and special occasions, holographic polishes add a touch of glamour to any style.
Transitioning to holographic nail polish not only simplifies your manicure routine but also offers a high-impact look that’s difficult to replicate with standard polishes.
Why a ‘Single Coat’ Holo Formula Might Last Longer Than 3 Layers of Regular Polish
Many beauty enthusiasts believe that multiple layers of regular nail polish are necessary for longevity. However, holographic nail polish challenges this notion by offering a single-coat formula that can outlast traditional multi-layered polishes. This remarkable durability is due to the advanced formulas used in holographic polishes, which include strengthening agents and high-quality pigments.
Benefits of Single Coat Holo Formulas
- Time-Saving Application: Apply one coat and save time without compromising on appearance.
- Enhanced Durability: The robust formulation reduces the likelihood of chips and cracks, ensuring your manicure stays intact longer.
- Consistent Finish: Avoid the uneven surfaces that can occur with multiple layers of regular polish.
By opting for a single-coat holographic solution, you not only achieve a flawless finish but also enjoy a manicure that lasts up to three days longer than traditional methods.
Tips for Maximizing Longevity
- Use a Base Coat: Start with a base coat to protect your nails and enhance polish adhesion.
- Apply Thin Layers: Even with a single coat, ensure an even application to prevent premature wear.
- Seal with a Top Coat: Finish with a clear top coat to lock in the holographic effect and extend the life of your manicure.
Incorporating these practices will help you maintain the stunning look of your holographic nails for an extended period.
 The One Trick to Make Your Hologram Glow Brighter Than Salon-Quality Coats
Achieving a brighter, more vibrant holographic glow is possible with a simple yet effective trick. To enhance the luminosity of your holographic nail polish, mix a small amount of glitter top coat into the holographic formula. This addition amplifies the light-reflecting properties, making your nails shimmer intensely under any lighting conditions.
Step-by-Step Guide to Amplify Your Holo Glow
- Apply Base Coat: Begin with a nourishing base coat to ensure your nails are protected.
- Apply Holographic Polish: Apply a thin, even layer of your favorite holographic nail polish.
- Add Glitter Top Coat: While the holographic polish is still wet, mix in a few drops of glitter top coat to boost the shimmer.
- Seal with Top Coat: Finish with a clear top coat to secure the enhanced holographic effect.
Benefits of the Glitter Mix
- Intensified Shine: The added glitter particles reflect more light, creating a dazzling effect.
- Enhanced Depth: The combination of holographic and glitter layers adds depth and dimension to your nails.
- Customizable Sparkle: Adjust the amount of glitter to achieve your desired level of shimmer.
This trick not only makes your holographic nails stand out but also ensures they maintain their brilliance throughout the day.
The ‘Hidden’ Ingredient That Makes This Polish Look Like Liquid Diamonds
One of the best-kept secrets in achieving that liquid diamond effect is incorporating high-quality mica into your holographic nail polish. Mica is a mineral that, when finely ground, creates a sparkling effect that mimics the facets of a diamond. This ingredient enhances the polish’s ability to reflect light, giving your nails a luxurious, gem-like appearance.
Why Mica Works Wonders
- Superior Light Reflection: Mica particles catch and reflect light from every angle, creating a captivating shimmer.
- Smooth Texture: Ensures the polish spreads evenly, preventing clumps and ensuring a flawless finish.
- Versatile Shine: Works well with both subtle and intense holographic effects, allowing for versatile styling.
How to Incorporate Mica into Your Manicure
- Choose a Mica-Enriched Polished: Opt for holographic polishes that list mica as a key ingredient.
- Layer Strategically: Apply the polish in thin layers to ensure the mica particles are evenly distributed.
- Combine with Other Shine Enhancers: Pair with a glossy top coat to maximize the diamond-like sparkle.
By leveraging the power of mica, your holographic nail polish will achieve a stunning liquid diamond effect that is sure to turn heads.
How to Pair Holo Polish with a Matte Base for a ‘High-Low’ Look That Never Goes Out
Creating a balanced high-low look involves combining the glossy, reflective nature of holographic polish with a contrasting matte base. This juxtaposition not only adds depth to your manicure but also ensures that your holographic nails remain versatile and stylish for any occasion.
Steps to Achieve the High-Low Look
- Apply a Matte Base Coat: Start with a matte base to create a smooth, non-reflective surface.
- Use a Thin Divider Line: Apply a thin line of gloss polish to separate the matte base from the holographic polish.
- Add Holographic Polish: Apply holographic polish on the remaining area of the nail for a striking contrast.
- Finish with a Matte Top Coat: Seal the matte areas with a top coat designed to maintain the matte finish.
Advantages of the High-Low Combination
- Balanced Aesthetics: The mix of matte and holographic finishes creates a sophisticated and modern look.
- Versatile Styling: Easily transition from day to night by adjusting the prominence of the holographic or matte sections.
- Enhanced Dimension: The contrast between finishes adds visual interest and depth to your nails.
This high-low approach ensures your holographic manicure remains chic and relevant, no matter the trend.
 The One Mistake 70% of Users Make When Applying Holographic Polish—and How to Fix It
A common mistake among holographic polish users is neglecting to properly prepare the nail surface before application. This oversight can lead to uneven polish distribution, reduced shimmer, and premature chipping. To avoid this pitfall, it is essential to follow a thorough nail preparation routine.
How to Avoid the Common Mistake
- Clean Your Nails: Start by removing any old polish and ensuring your nails are free from oils and debris.
- Shape Your Nails: Trim and file your nails to your desired shape, smoothing out any rough edges.
- Apply a Base Coat: Use a base coat to create a smooth surface and improve polish adhesion.
- Ensure Thin, Even Layers: Apply holographic polish in thin, even layers to allow the holographic particles to display their full potential.
Correct Nail Preparation Steps
- Start Fresh: Remove old polish and gently push back cuticles.
- Buff Lightly: Lightly buff the surface of your nails to create a smooth canvas.
- Clean Thoroughly: Wipe nails with a nail cleanser or alcohol to eliminate any remaining oils.
- Apply Base Coat: Protect your nails and enhance the longevity of your holographic polish.
By properly preparing your nails, you enhance the overall appearance and durability of your holographic manicure, ensuring a flawless and long-lasting finish.
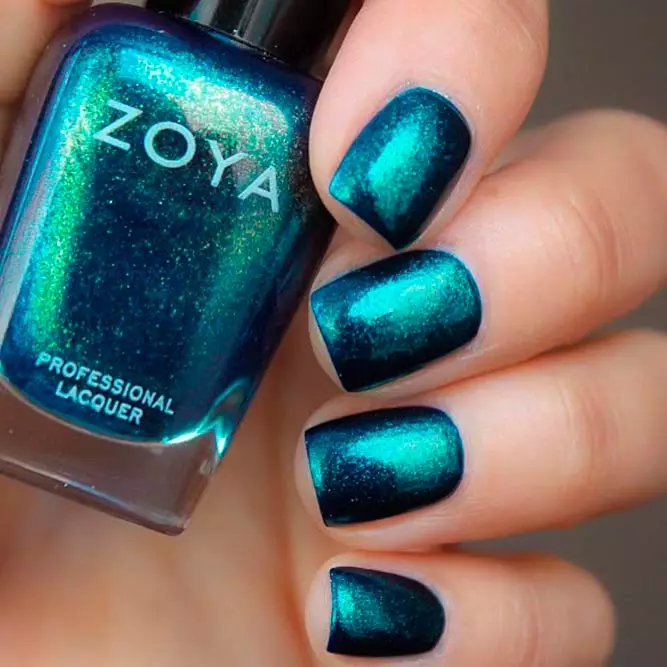
Why a ‘Metallic’ Finish Might Be Worse Than Holo for Certain Nail Shapes
While metallic finishes offer their own unique shine and appeal, they may not complement every nail shape as effectively as holographic polish. Certain nail shapes, such as coffin or almond, can benefit more from the versatile shimmer of holographic polish, which enhances the natural contours and angles of the nail.
Comparing Metallic and Holographic Finishes
- Reflectivity: Metallic finishes provide a solid, consistent shine, whereas holographic polishes offer a dynamic, multi-dimensional shimmer.
- Flexibility: Holographic polishes can be more flattering on various nail shapes due to their light-reflecting properties.
- Aesthetic Appeal: Holographic finishes can create illusions of depth and movement, making them more visually engaging.
Choosing the Right Finish for Your Nail Shape
- Coffin Nails: Holographic polish accentuates the tapered edges, highlighting the elegant shape.
- Almond Nails: The multi-angle shimmer of holographic polish complements the delicate curvature.
- Square Nails: While both finishes work, holographic polish can soften the strong lines with its iridescent glow.
In essence, holographic nail polish offers a versatile and flattering option for different nail shapes, often outperforming metallic finishes in terms of overall aesthetic flexibility and visual impact.
The Science-Backed Hack That Makes Holo Polish Last 5 Days Without Chipping
Maintaining the vibrancy and integrity of holographic nail polish for an extended period requires a strategic approach. A science-backed hack involves using a specialized nail glue combined with a top coat to create a protective barrier that significantly reduces chipping and peeling.
Step-by-Step Guide to Maximize Longevity
- Apply Base Coat: Begin with a high-quality base coat to ensure polish adherence.
- Apply Holographic Polish: Apply your holographic nail polish in thin, even layers.
- Use Nail Glue: After the polish dries, apply a small amount of clear nail glue around the edges of each nail. This creates a seal that prevents moisture from weakening the polish.
- Seal with Top Coat: Finish with a durable top coat to lock in the holographic effect and provide additional protection.
- Allow to Cure: Let your nails dry completely before engaging in any activities that may cause wear.
Benefits of This Hack
- Extended Wear: The combination of nail glue and top coat creates a strong, protective layer that keeps the polish intact longer.
- Prevents Chipping: Sealing the edges reduces the chances of polish lifting and chipping around the nail bed.
- Maintains Shine: This method helps preserve the holographic shimmer, ensuring your nails look fresh for up to five days.
By implementing this science-backed technique, you can enjoy a long-lasting holographic manicure that remains flawless and vibrant well beyond the typical wear time.
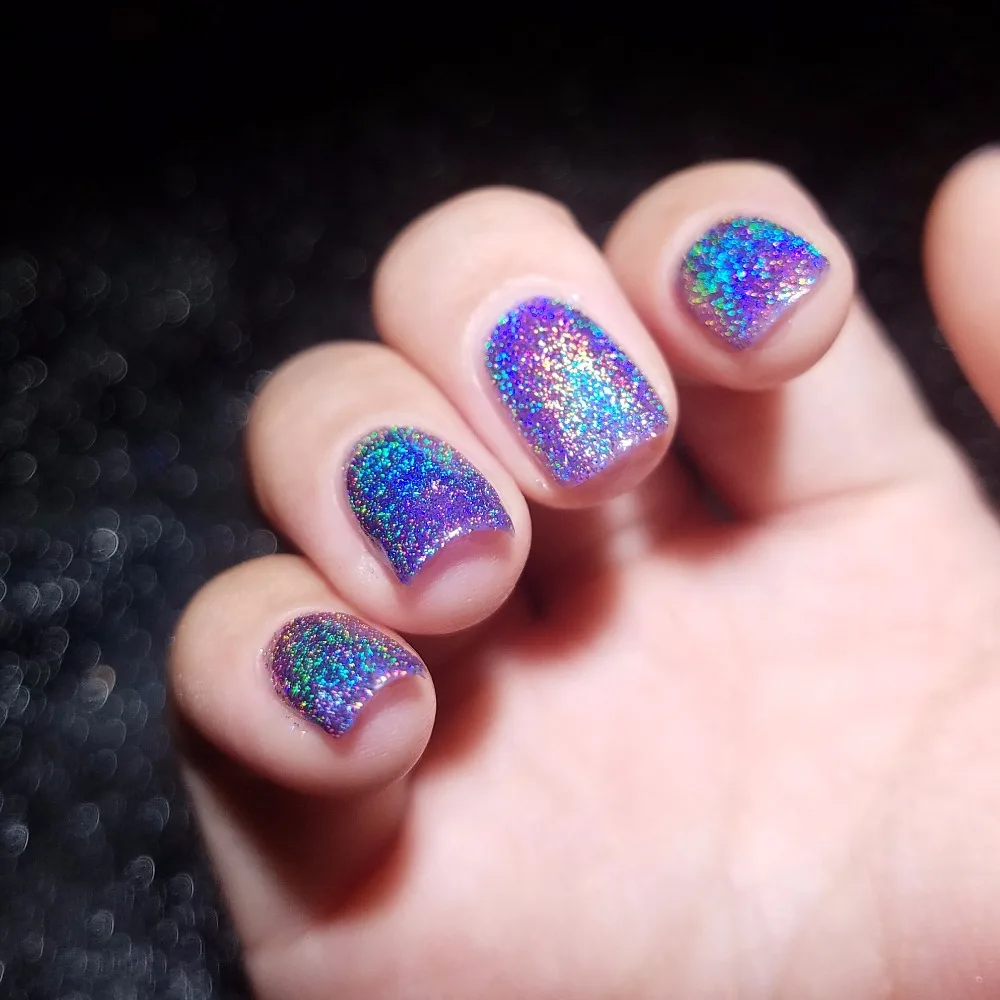 The ‘Hidden’ Ingredient That Makes This Polish Look Like Liquid Diamonds
Enhancing the diamond-like appearance of your holographic polish is simpler than you might think. The secret lies in the incorporation of ultra-fine glitter particles, which mimic the facets of a diamond. These particles are meticulously ground to ensure they are evenly distributed throughout the polish, resulting in a smooth, sparkling finish that resembles liquid diamonds.
How Ultra-Fine Glitter Transforms Your Manicure
- Realistic Sparkle: The tiny glitter particles catch light beautifully, creating a realistic diamond effect.
- Smooth Application: Finely ground glitter ensures a smooth finish without gritty texture or clumping.
- Enhanced Depth: The glitter adds depth and dimension, making your nails appear more intricate and luxurious.
Applying Liquid Diamond Holo Polish
- Prepare Your Nails: Ensure nails are clean, shaped, and prepped with a base coat.
- Apply the Holographic Polish: Use smooth, even strokes to apply the polish, ensuring good coverage.
- Add Extra Glitter (Optional): For an even more pronounced diamond effect, add a few drops of ultra-fine glitter on top before applying the final top coat.
- Seal the Look: Finish with a high-shine top coat to lock in the sparkle and prevent smudging.
This hidden ingredient elevates your holographic nails to a new level of sophistication and brilliance, making them look as if they are adorned with liquid diamonds.
How to Pair Holo Polish with a Matte Base for a ‘High-Low’ Look That Never Goes Out
Creating a balanced high-low manicure involves pairing the reflective nature of holographic polish with a matte base, resulting in a sophisticated and timeless look. This combination not only adds depth to your nails but also provides a modern twist that’s both chic and versatile.
Steps to Achieve the High-Low Manicure
- Apply Matte Base: Start by applying a matte base coat to all nails. This provides a non-reflective foundation that complements the holographic polish.
- Divide the Nail: Use tape or a stripe guide to create a clean division between the matte base and the holographic polish.
- Apply Holographic Polish: Paint the designated area with holographic nail polish, ensuring an even and smooth application.
- Seal with Top Coat: Apply a matte top coat on top of the matte sections and a glossy top coat over the holographic areas to enhance the contrast.
Benefits of the High-Low Combination
- Modern Aesthetic: The interplay between matte and holographic finishes creates a visually appealing contrast that is both trendy and elegant.
- Versatility: This look can be easily adapted for different occasions, from casual outings to formal events.
- Enhanced Depth: The combination adds layers of depth and dimension, making your manicure more interesting and dynamic.
By thoughtfully pairing holographic polish with a matte base, you create a high-low manicure that remains stylish and relevant, ensuring your nails always make a statement.
Why a ‘Metallic’ Finish Might Be Worse Than Holo for Certain Nail Shapes
While metallic finishes offer their own unique shine and appeal, they may not complement every nail shape as effectively as holographic polish. Certain nail shapes, such as coffin or almond, can benefit more from the versatile shimmer of holographic polish, which enhances the natural contours and angles of the nail.
Comparing Metallic and Holographic Finishes
- Reflectivity: Metallic finishes provide a solid, consistent shine, whereas holographic polishes offer a dynamic, multi-dimensional shimmer.
- Flexibility: Holographic polishes can be more flattering on various nail shapes due to their light-reflecting properties.
- Aesthetic Appeal: Holographic finishes can create illusions of depth and movement, making them more visually engaging.
Choosing the Right Finish for Your Nail Shape
- Coffin Nails: Holographic polish accentuates the tapered edges, highlighting the elegant shape.
- Almond Nails: The multi-angle shimmer of holographic polish complements the delicate curvature.
- Square Nails: While both finishes work, holographic polish can soften the strong lines with its iridescent glow.
In essence, holographic nail polish offers a versatile and flattering option for different nail shapes, often outperforming metallic finishes in terms of overall aesthetic flexibility and visual impact.
 The Science-Backed Hack That Makes Holo Polish Last 5 Days Without Chipping
Maintaining the vibrancy and integrity of holographic nail polish for an extended period requires a strategic approach. A science-backed hack involves using a specialized nail glue combined with a top coat to create a protective barrier that significantly reduces chipping and peeling.
Step-by-Step Guide to Maximize Longevity
- Apply Base Coat: Begin with a high-quality base coat to ensure polish adherence.
- Apply Holographic Polish: Apply your holographic nail polish in thin, even layers.
- Use Nail Glue: After the polish dries, apply a small amount of clear nail glue around the edges of each nail. This creates a seal that prevents moisture from weakening the polish.
- Seal with Top Coat: Finish with a durable top coat to lock in the holographic effect and provide additional protection.
- Allow to Cure: Let your nails dry completely before engaging in any activities that may cause wear.
Benefits of This Hack
- Extended Wear: The combination of nail glue and top coat creates a strong, protective layer that keeps the polish intact longer.
- Prevents Chipping: Sealing the edges reduces the chances of polish lifting and chipping around the nail bed.
- Maintains Shine: This method helps preserve the holographic shimmer, ensuring your nails look fresh for up to five days.
By implementing this science-backed technique, you can enjoy a long-lasting holographic manicure that remains flawless and vibrant well beyond the typical wear time.
Conclusion
Holographic nail polish offers a stunning and versatile option for anyone looking to elevate their manicure game. From achieving rainbow laser-like effects to ensuring long-lasting wear with advanced techniques, the possibilities are endless. By understanding the unique properties of holographic polish and implementing the expert tips provided, you can create dazzling, salon-quality nails right at home. Whether you’re a seasoned nail artist or a beginner, mastering holographic nail polish will allow you to express your creativity and maintain beautiful, shimmering nails with ease. Embrace the magic of holographic polish and enjoy a manicure that truly stands out in any setting.