Exploring new nail polish ideas can transform your manicure from ordinary to extraordinary. Whether you have short nails or long acrylics, there are countless designs and techniques to express your personal style. This comprehensive guide offers a variety of nail polish ideas, ensuring your nails remain a stunning accessory for any event or season. From bold colors for dark skin tones to DIY temporary tattoos, these ideas cater to every preference and nail type. Let’s dive into the world of vibrant and innovative nail art.
 Polish Ideas for Short Nails: Stylish Designs That Highlight Petite Tips
Short nails don’t have to limit your creativity. In fact, certain designs can accentuate the elegance of petite tips. Here are some stylish nail polish ideas specifically tailored for short nails:
Minimalist Designs
Minimalist nail art focuses on simple yet sophisticated patterns. Consider:
- Single Accent Nail: Paint one nail with a contrasting color or a subtle design while keeping the others a solid shade.
- Thin Lines or Dots: Add delicate lines or small dots in metallic or bright colors to create visual interest without overwhelming the nail.
French Manicure with a Twist
Update the classic French manicure by incorporating modern elements:
- Colored Tips: Instead of traditional white, choose pastel or bold colors for the tips.
- Negative Space: Leave small sections of the natural nail visible for a trendy, contemporary look.
Geometric Patterns
Geometric shapes can make short nails look chic and fashionable:
- Triangles and Squares: Use tape or nail stickers to create clean lines and shapes.
- Abstract Designs: Combine different geometric elements for a unique and artistic appearance.
Floral Accents
Adding small floral designs can enhance the beauty of short nails:
- Tiny Flowers: Use a fine brush or nail decals to place small flowers on one or two nails.
- Watercolor Effects: Blend soft colors to create a watercolor floral pattern that adds depth and dimension.
These nail polish ideas demonstrate that short nails can be a canvas for stylish and eye-catching designs. By choosing the right patterns and colors, you can highlight the natural beauty of petite tips.
 FAQ: How to Create Ombre Effects Without Stripes – Nail Polish Mixing Tips
Ombre nails are a popular trend, but achieving a seamless gradient without visible stripes can be challenging. Here’s how to create beautiful ombre effects smoothly using effective mixing techniques.
Understanding Ombre
Ombre involves blending two or more colors seamlessly across the nail. The key is to ensure a smooth transition without harsh lines or stripes.
Nail Polish Mixing Tips
To create an ombre effect without stripes, follow these steps:
- Choose Compatible Colors: Select colors that blend well together. Gradually transitioning from light to dark shades of the same color family works best.
- Use a Makeup Sponge: Dip a damp makeup sponge into each color, overlapping slightly where the colors meet.
- Apply in Layers: Gently press the sponge onto your nail, repeating the process until the desired gradient is achieved.
- Perfect the Blend: Lightly tap the sponge to ensure there are no visible lines between the colors. Continue blending until the transition is smooth.
- Seal with Top Coat: Finish with a clear top coat to lock in the gradient and add shine.
Additional Tips
- Practice Patience: Take your time to blend the colors gradually. Rushing can lead to uneven transitions.
- Use a Base Coat: Apply a base coat to protect your nails and provide a smooth surface for the ombre application.
- Experiment with Tools: Different sponges and brushes can yield varying results. Find the tools that work best for your desired effect.
By following these nail polish mixing tips, you can create stunning ombre effects that flow beautifully without any stripes, enhancing the overall elegance of your manicure.
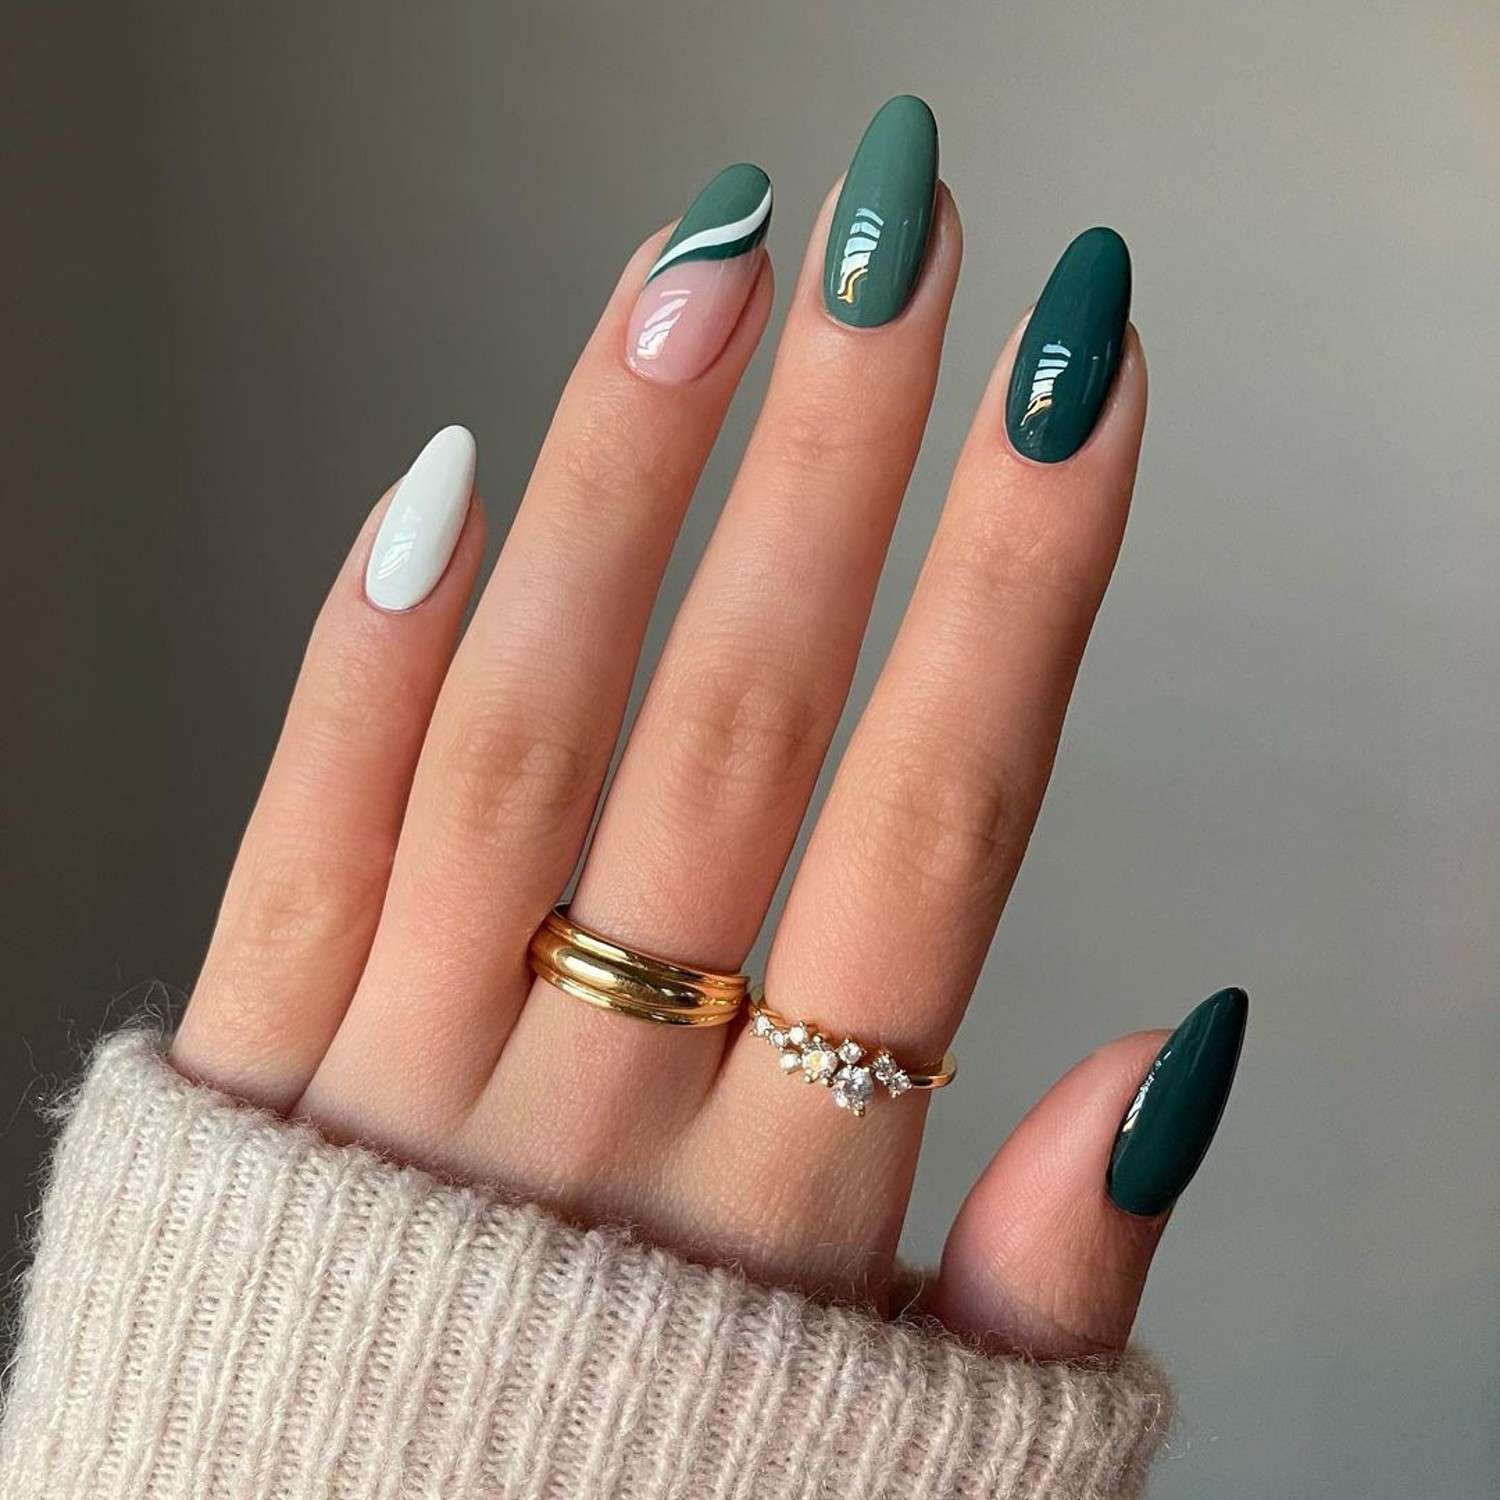
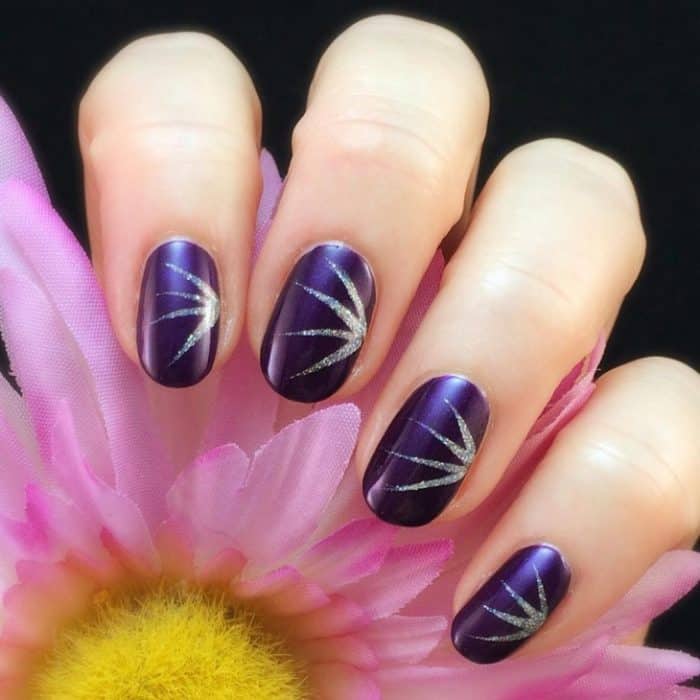
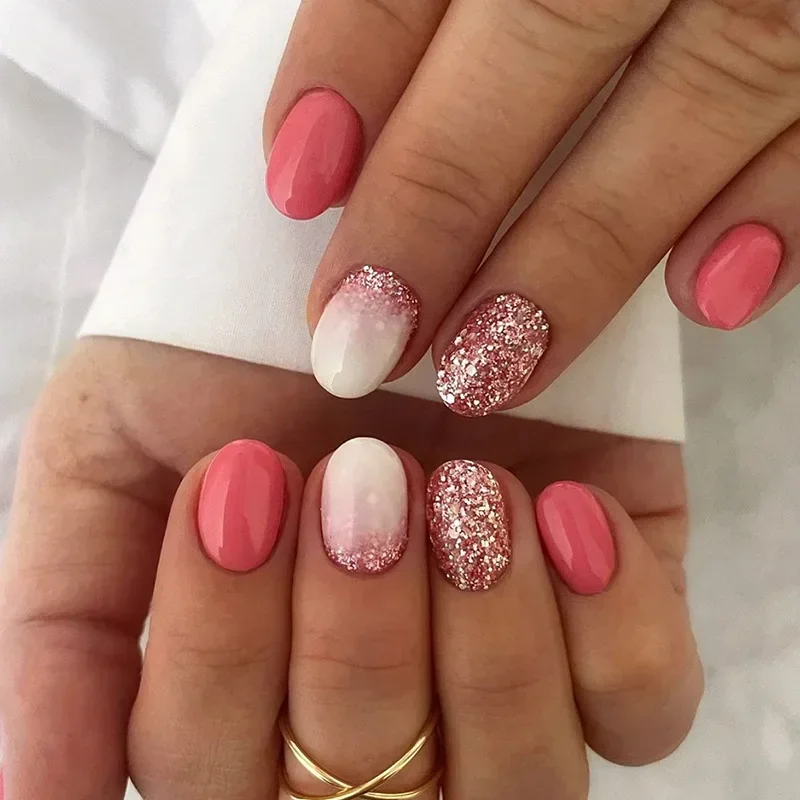
Polish Ideas with Glitter & Matte Combinations – Trendy Contrasting Looks
Combining glitter and matte finishes can create a striking contrast that elevates your nail art. This trend adds depth and interest, making your nails stand out with a unique, multi-textured look.
Glitter Accent Nails
Applying glitter to just one or two nails can add sparkle without overwhelming the design:
- Feature Nail: Choose a single nail (usually the ring finger) to apply glitter over a solid base color.
- Partial Glitter: Add glitter to the tips or as a small accent at the base for a subtle shimmer.
Matte and Glossy Balance
Balancing matte and glossy finishes creates an appealing contrast:
- Matte Base with Gloss Accents: Paint the entire nail with a matte polish and add a glossy stripe or dot for emphasis.
- Glossy Base with Matte Art: Start with a shiny base and incorporate matte designs or lines to break the shine.
Geometric Glitter Patterns
Integrate glitter into geometric patterns for a modern twist:
- Polka Dots and Stripes: Use glitter polishes to create bold polka dots or stripes on a matte background.
- Triangles and Squares: Fill geometric shapes with glitter while keeping the surrounding areas matte.
Gradient Glitter Effects
Create a gradient effect by mixing glitter and matte:
- Top to Bottom Gradient: Start with a matte color at the base and gradually add glitter towards the tips.
- Side Gradient: Apply glitter starting from one side of the nail, blending into the matte finish on the other side.
Seasonal Glitter Ideas
Adapt your glitter and matte combinations to fit seasonal themes:
- Holiday Sparkle: Incorporate festive colors with glitter accents for holiday-themed nails.
- Spring Shimmer: Use pastel matte shades paired with fine glitter for a fresh spring look.
These nail polish ideas featuring glitter and matte combinations offer a versatile and trendy approach to nail art. By experimenting with different textures and placements, you can achieve a polished and fashionable manicure.
 Polish Ideas for Dark Skin Tones: Bold Colors & Patterns That Pop
Dark skin tones beautifully complement a wide range of nail polish colors and patterns. Embracing bold and vibrant nail polish ideas can highlight your skin’s natural richness and create stunning visual contrasts.
Bold and Bright Colors
Dark skin tones can rock a variety of bright and bold colors with exceptional vibrancy:
- Electric Blue and Royal Purple: These shades create a striking contrast, making your nails appear vivid and lively.
- Fuchsia and Coral: These warm, intense colors add a pop of brightness that complements dark skin beautifully.
Metallic Finishes
Metallic polishes can add a touch of glamour and sophistication:
- Gold and Bronze: These warm metallics enhance the natural warmth of dark skin tones.
- Silver and Gunmetal: These cooler metallics offer a sleek and modern look, perfect for evening events.
Deep and Rich Hues
Deep colors add a luxe and elegant feel to your nails:
- Burgundy and Merlot: These rich reds provide a sophisticated and timeless appeal.
- Navy and Forest Green: These dark shades offer a classic and versatile option for everyday wear.
Intricate Patterns and Art
Incorporating patterns can elevate your nails to an art form:
- Floral Designs: Use vibrant colors to create detailed floral patterns that stand out against dark skin.
- Abstract Art: Embrace bold lines and shapes in contrasting colors for a contemporary and edgy look.
Gradient and Ombre Styles
Gradient techniques can create a smooth transition between colors, enhancing the depth of your manicure:
- Two-Tone Ombre: Blend complementary colors that highlight your skin tone.
- Multi-Color Gradients: Use several colors to create a dynamic and eye-catching gradient effect.
Glitter and Rhinestone Embellishments
Add sparkle and dimension with glitter and rhinestones:
- Full Glitter Nails: Cover all nails with glitter for a dazzling, high-impact look.
- Accent Rhinestones: Place small rhinestones strategically to add subtle sparkle without overpowering the design.
These nail polish ideas for dark skin tones celebrate boldness and creativity. By selecting the right colors and patterns, you can achieve a manicure that not only complements your skin but also makes a powerful style statement.
Polish Ideas for Acrylic Nails: Long-Lasting Designs That Resist Chips
Acrylic nails provide a durable canvas for sophisticated and long-lasting nail polish ideas. Here are some design techniques and tips to ensure your acrylic manicure remains flawless and chip-resistant.
Choosing the Right Polishes
Select high-quality polishes specifically formulated for acrylic nails:
- Long-Wear Formulas: Opt for polishes that offer extended wear without chipping.
- Chip-Resistant Finishes: Look for top coats and polishes designed to resist chipping and peeling.
Sealed Designs
Sealing designs properly is crucial for longevity:
- Base and Top Coats: Always use a strong base coat and a durable top coat to protect your design.
- Layering Techniques: Apply multiple thin layers instead of thick ones to enhance durability and prevent cracking.
Minimalist and Elegant Designs
Simple designs can look sophisticated and last longer on acrylic nails:
- Single Color with Gloss Finish: Choose a single, bold color and finish with a high-gloss top coat.
- Subtle Metallic Accents: Add thin metallic lines or small decals for an elegant touch without compromising durability.
Intricate Patterns and 3D Art
For more elaborate designs, ensure proper sealing to prevent chips:
- 3D Embellishments: Use acrylic-safe rhinestones or studs and secure them with a strong top coat.
- Detailed Hand-Painted Art: Enhance intricate designs with a clear top layer to lock in the details.
Ombré and Gradient Techniques
Achieve a smooth gradient that stands up to daily wear:
- Professional Tools: Utilize sponges and brushes designed for acrylic nails to blend colors seamlessly.
- Layered Top Coats: Apply several thin top coats to reinforce the gradient and add shine.
Maintenance Tips
Proper maintenance can extend the life of your acrylic manicure:
- Regular Touch-Ups: Inspect your nails regularly and apply touch-ups as needed to maintain the integrity of the design.
- Avoid Harsh Chemicals: Protect your nails from excessive exposure to water and cleaning agents by wearing gloves when necessary.
- Moisturize: Keep your nails and cuticles moisturized to prevent brittleness and maintain overall nail health.
These nail polish ideas for acrylic nails focus on durability and elegance, ensuring your manicure remains stunning and chip-free for an extended period. By choosing the right polishes and application techniques, you can enjoy long-lasting and beautiful nail art.
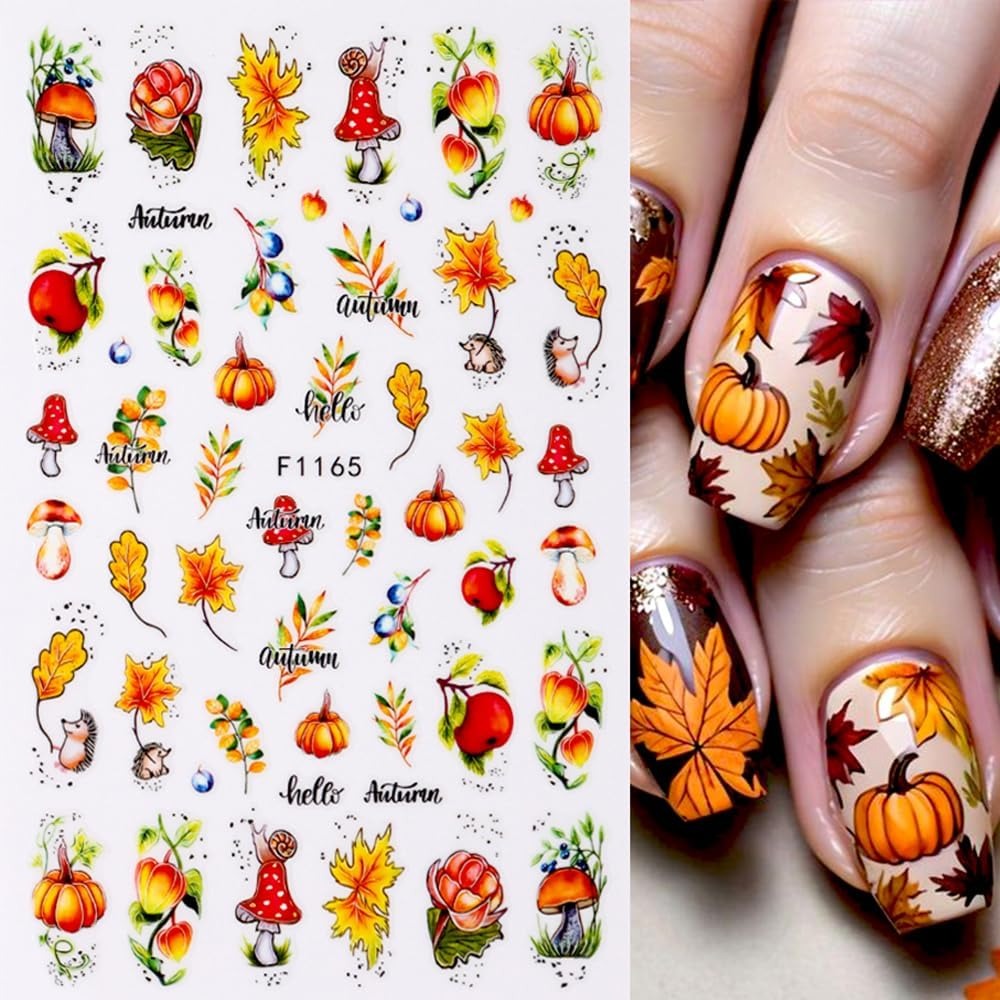
 Polish Ideas with Seasonal Themes: Holiday, Halloween & Spring Designs
Embracing seasonal themes in your nail polish ideas allows your manicure to reflect the spirit of each time of year. Whether it’s for a festive holiday, spooky Halloween, or vibrant spring, there’s a design to match every season.
Holiday-Inspired Designs
Celebrate various holidays with themed nail art:
- Christmas: Incorporate traditional colors like red and green, add snowflake decals, or create a Santa-inspired design with white glitter.
- New Year’s Eve: Use metallic polishes, glitter accents, and shiny top coats to capture the celebratory vibe.
- Thanksgiving: Experiment with autumnal shades such as burnt orange, mustard yellow, and deep browns, complemented by leaf motifs.
Halloween Nail Art
Halloween offers a fun opportunity to explore creative and spooky nail designs:
- Dark Themes: Utilize black, deep purple, and orange polishes to create eerie looks.
- Creative Characters: Paint miniature pumpkins, ghosts, bats, or skulls for a playful yet spooky effect.
- Textured Designs: Add textures like matte finishes or use special effect polishes to enhance the Halloween theme.
Spring-Inspired Looks
Spring is all about fresh, vibrant colors and floral patterns:
- Pastel Colors: Soft pinks, lilacs, and mint greens are perfect for a delicate spring manicure.
- Floral Patterns: Hand-paint or use stickers to add blooming flowers and leafy designs to your nails.
- Nature Motifs: Incorporate designs inspired by nature, such as butterflies, raindrops, or greenery.
Summer Vibes
For the summer months, embrace bright and bold nail polish ideas:
- Tropical Colors: Use shades like bright yellow, turquoise, and coral to evoke a tropical feel.
- Beach Themes: Create designs featuring seashells, waves, or sunsets.
- Fun Accents: Add playful elements like tiny umbrellas, flamingos, or starfish for a whimsical summer touch.
Fall Elegance
Autumn calls for rich, warm colors and cozy designs:
- Earthy Tones: Embrace colors like burgundy, olive green, and deep orange.
- Leaf Patterns: Paint or apply decals of falling leaves and branches.
- Textured Finishes: Use matte polishes or add a touch of shimmer to emulate the changing seasons.
Winter Wonderland
Winter offers a chance to create elegant and frosty nail art:
- Icy Shades: Use cool blues, silvers, and whites to mimic a winter landscape.
- Snowflake Designs: Add delicate snowflake patterns for a serene and magical look.
- Glitter and Sparkle: Incorporate glitter to represent frost and sparkling ice.
By integrating seasonal themes into your nail polish ideas, you can keep your manicure fresh and relevant throughout the year. Each season brings unique opportunities to experiment with colors, patterns, and textures, allowing your nails to celebrate the changing times.
 Final Thoughts
Exploring diverse nail polish ideas allows you to express your creativity and adapt your manicure to any occasion or mood. From stylish designs for short nails to bold patterns that complement dark skin tones, the possibilities are endless. Incorporating techniques like ombre effects, glitter and matte combinations, and temporary tattoos can elevate your nail art to new heights. Additionally, tailoring your designs to seasonal themes ensures your nails remain fresh and relevant all year round. Whether you prefer minimalist elegance or intricate, eye-catching patterns, these nail polish ideas offer something for everyone. Embrace these strategies, experiment with different styles, and let your nails be a vibrant reflection of your personality and creativity.